


5 Simple Tips That Will Give You Picture-Perfect Madeleines Every Time
These pretty French cakes are actually a cinch to make.


Levi Brown
It’s hard not to fall in love with madeleines. Whether you enjoy them alongside your morning cup of coffee or put these sweet, shell-shaped cakes out for an afternoon tea or get-together, they always feel extra-special. Maybe it’s their rich, buttery flavor (touched by just a hint of citrus) or perhaps it’s their pretty scalloped design (swoon) — all I know is that I’ve never met a single person who doesn’t adore them.
You might think that treating yourself to a batch of madeleines requires a trip to the bakery, but they’re actually surprisingly easy to make at home. You don’t need any special equipment other than a madeleine pan (which comes in a variety of sizes and materials to fit every budget) and a few simple tips from our Brown Butter Madeleines class on the Food Network Kitchen app.
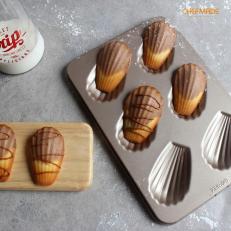

Butter and Flour Your Pan
This one is key, even if your pan is nonstick. A thin layer of butter (be sure it reaches into all the grooves of the pan) and a dusting of all-purpose flour provide extra insurance that your cakes will release easily and cleanly, once baked.
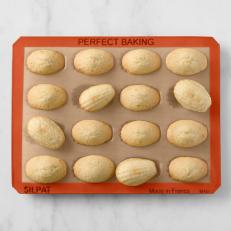
Fill You Pan Evenly
It’s best to start by adding just a little batter to each indentation in the pan. You can always go back and add more later. By making sure that each madeleine is filled equally, you ensure that your cakes will cook up uniformely — giving each one a nice, light golden color around the edges.
Check Your Oven Sooner, Rather Than Later
Recipes always give the bake time as a range. For example, our Brown Butter Madeleines bake for 12-14 minutes. Always check on your sweet treats when they reach the lowest end of that range, in this case 12 minutes. If they’re not lightly browned along the edges and springing back to the touch you can always continue baking them. But, if you wait a full 14 minutes before checking them, they could burn.
Unmold Right Away
As soon as your madeleines are fully baked, remove them from the oven and unmold the cookies onto a cooling rack — so that they don’t trap steam and get soggy. The easiest way to do this is to simply nudge them out from the bottom with an offset spatula or butter knife. If you buttered and floured your pan well, they should slide right out without sticking.
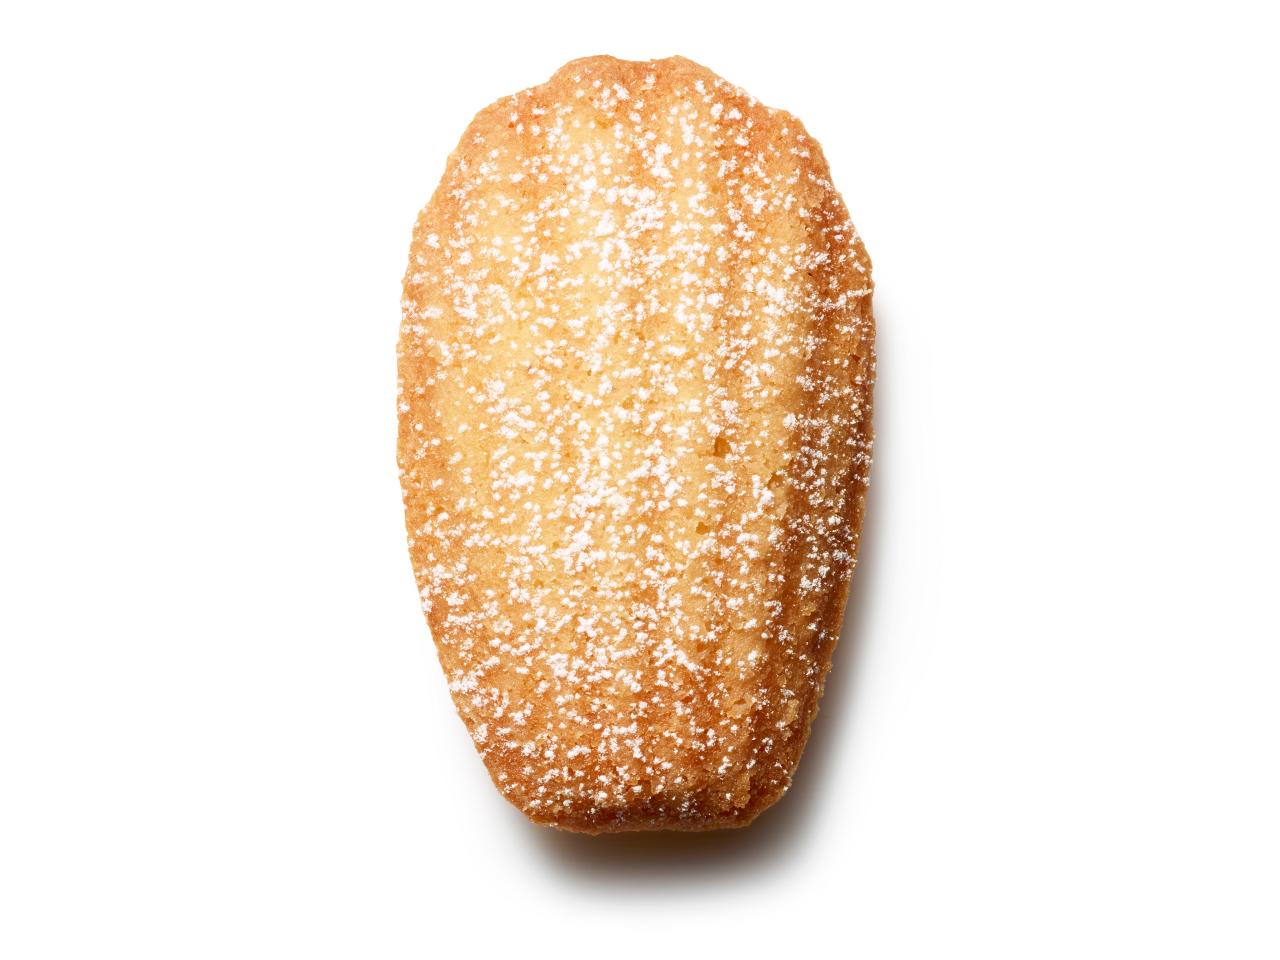
Cool Completely Before Dusting with Sugar
I know it’s tempting to want to eat these pretty little confections right away but if you dust them with powdered sugar while they’re still warm, they’ll absorb the sugar and become too sweet. Once the cakes have cooled completely, use a sifter to gently shower sugar onto them and you’ll have a batch of absolutely picture-perfect treats.


