Recipe courtesy of Jacques Torres
Recipe courtesy of Jacques Torres
Show:
Cooking Live
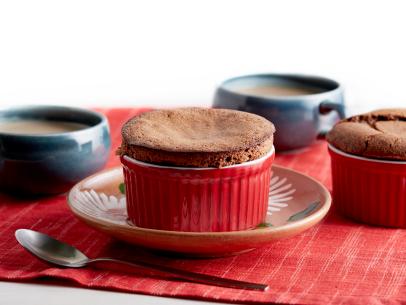
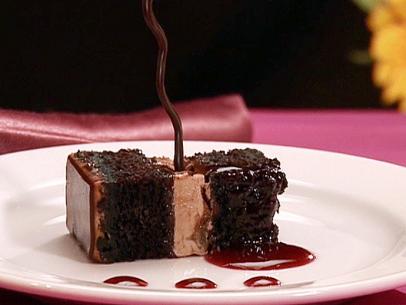
Jacques Easy Chocolate Cake
Getting reviews...
- Total: 1 hr 30 min
- Prep: 30 min
- Cook: 1 hr
- Yield: Yield: 1 (10-inch) cake; 10 t
-
- Nutritional Analysis
- Per Serving
- Serving Size
- 1 of 10 servings
- Calories
- 458
- Total Fat
- 31 g
- Saturated Fat
- 19 g
- Carbohydrates
- 42 g
- Dietary Fiber
- 4 g
- Sugar
- 35 g
- Protein
- 7 g
- Cholesterol
- 133 mg
- Sodium
- 46 mg
Ingredients
Directions
- Preheat the oven to 350 degrees F. Spray a 10-inch cake pan with vegetable cooking spray. Line the bottom of the pan with a 10-inch parchment paper circle. Spray the top of the parchment paper circle with vegetable cooking spray.
- Place both chopped chocolates in a bowl and melt over a double boiler.
- Combine the sugar and water in a 1-quart saucepan and place over medium-high heat. Bring to a boil until all of the sugar is dissolved. Pour the hot syrup into the bowl of melted chocolate. Whisk until the mixture is homogenous. Add the butter and whisk until well mixed.
- Use an electric mixer to beat the eggs and sugar until well blended. Use a rubber spatula to fold this mixture into the chocolate mixture. Be careful to mix gently.
- Pour the batter into the prepared cake pan. Place a baking sheet with one-inch sides in the oven. Place the filled cake pan on the baking sheet. Fill the baking sheet with water so the water covers the bottom inch of the cake pan. Bake until the cake surface appears dull and taut when pressed in the middle, about 40 minutes.
- Remove the cake pan from the oven and allow to cool on a wire rack. Turn off the oven and let the baking sheet and water cool before you attempt to remove them.
- TEMPERING CHOCOLATE: Tempering is important because it determines the final gloss, hardness, and contraction of the chocolate. Those factors are evidence that the cocoa butter in the chocolate has been correctly crystallized. Chocolate is purchased in its tempered form. It snaps when you break it, usually has a nice shine to it and it is hard. In order to use it, you need to melt it. When you melt chocolate, the molecules of fat separate and you lose the temper (crystallization). If you want to use the chocolate for molding or coating, it needs to be tempered. Tempering chocolate means putting the molecules of fat back together. There are a variety of ways to do it.
- One of the easiest ways to temper it is to place the chocolate in a glass bowl and put it in the microwave for 30 seconds at a time on high power until the chocolate is melted. Be very careful not to overheat it. Keep an eye on it; the chocolate will not look like it has melted because it retains its shape. The chocolate should be only slightly warmer than your bottom lip. You may still see lumps in it but, don't worry; the residual heat of the chocolate will melt them. You can also use an immersion blender to break up the lumps and start the recrystallization process. Usually, the chocolate begins to set (recrystallize) along the side of the bowl. As it begins to crystallize, mix those crystals into the melted chocolate and they will begin the recrystallization process. I like to use a glass bowl because it retains the heat and keeps the chocolate tempered a long time.
- Here is another easy way to temper chocolate. In this method, tempering is achieved by adding small pieces of unmelted chocolate to melted chocolate. The amount of unmelted chocolate to be added depends on the temperature of the melted chocolate but is usually one fourth of the total amount. I use an immersion blender to mix the 2 together.
- The classic way to temper chocolate is call tabliering. Chocolate is melted over a hot water bath to a temperature between 88 and 90 F (31 to 34 C). White and milk chocolate are melted to a temperature approximately 2 F less, depending on the amount of milk fat they contain. 2/3 of the melted chocolate is poured on a cold table or marble surface. The chocolate is spread out and worked with a spatula until the temperature of the chocolate is approximately 81 F (27 C). At this stage, it is thick and begins to set. This tempered chocolate is then added to the remaining one third of non-tempered chocolate and mixed thoroughly until the mass in the bowl has a completely uniform temperature. If the temperature is still too high, part of the chocolate is further worked on the cold table until the correct temperature is reached. This is a lot of work, requires a lot of room and makes a big mess.
- Here is a tip: Temper more chocolate than you need. A larger quantity will hold its temper longer than a smaller quantity (just like a large cup of coffee will stay hot longer than a small cup of espresso). You can always reuse the extra chocolate. Most people have trouble tempering because they use too small of an amount. Don't forget to use a glass bowl.
- A simple method of checking tempering is by applying a small quantity of chocolate to a piece of paper or to the point of a knife. If the chocolate has been correctly tempered it will harden evenly and show a good gloss within 5 minutes.
- Remember, just like everything else in life, practice makes perfect. If your chocolate does not temper the first time, you can still eat it! Now that is an incentive!