


- Level: Advanced
- Total: 20 hr 30 min (includes setting time)
- Active: 2 hr 45 min
- Yield: 1 box
- Level: Advanced
- Total: 20 hr 30 min (includes setting time)
- Active: 2 hr 45 min
- Yield: 1 box
Ingredients
Three-Inch Entremet (or can be purchased):
Assembly:
White Chocolate Mousse:
Old School Sugar Cookies:
Glaze:
Royal Icing:
Directions

Special equipment:
two 6-cavity 4-ounce dome molds; an acetate sheet; a 4-inch square stencil; a 3 1/2-inch square stencil; 3 parchment paper cornets; a hand blender- Fill each dome mold cavity to 1/4-inch from the top with White Chocolate Mousse, then place an Old School Sugar Cookie on top of each, pressing lightly to make it level.
- Freeze until solid, at least 2 hours, and unmold onto a wire cooling rack set on a sheet pan. Pour the Glaze over the domes to make an even coating on each. Top each dome with a gold petal. (Makes 12 entremets; reserve remaining for another use.)
- Line a sheet pan with acetate, dust evenly with cornstarch and set aside.
- Lightly dust your workspace with cornstarch and roll out the gum paste to 1/8-inch thick. Using the 4-inch square stencil, cut 1 square. Place the 3 1/2-inch square stencil in the center of the 4-inch square, then score the gum paste around the stencil; cut all the way through to prevent pulling and warping the shape of the frame. Repeat 7 more times. Transfer the frames to the lined sheet pan and allow to dry 8 hours or up to overnight.
- Fill a cornet with about 1/3 cup Royal Icing, snip the tip (about 7 millimeters) and begin piping your design in each frame, connecting the lines to the edges of the frame. Set aside to dry completely, about 2 hours.
- Once dry, carefully brush any excess cornstarch off the frame and balance the frames on little cups or vessels of the same height so that the frame is suspended flat. Fill another cornet with another 1/3 cup Royal Icing, snip the tip (about 4 millimeters) and begin to pipe thin lines, starting at the edge of the frame, allowing gravity to let them drape down a bit. Connect again at the thicker dried Royal Icing and connect finally at the opposite edge of the frame. Continue with all frames and allow to dry completely, 1 to 2 hours.
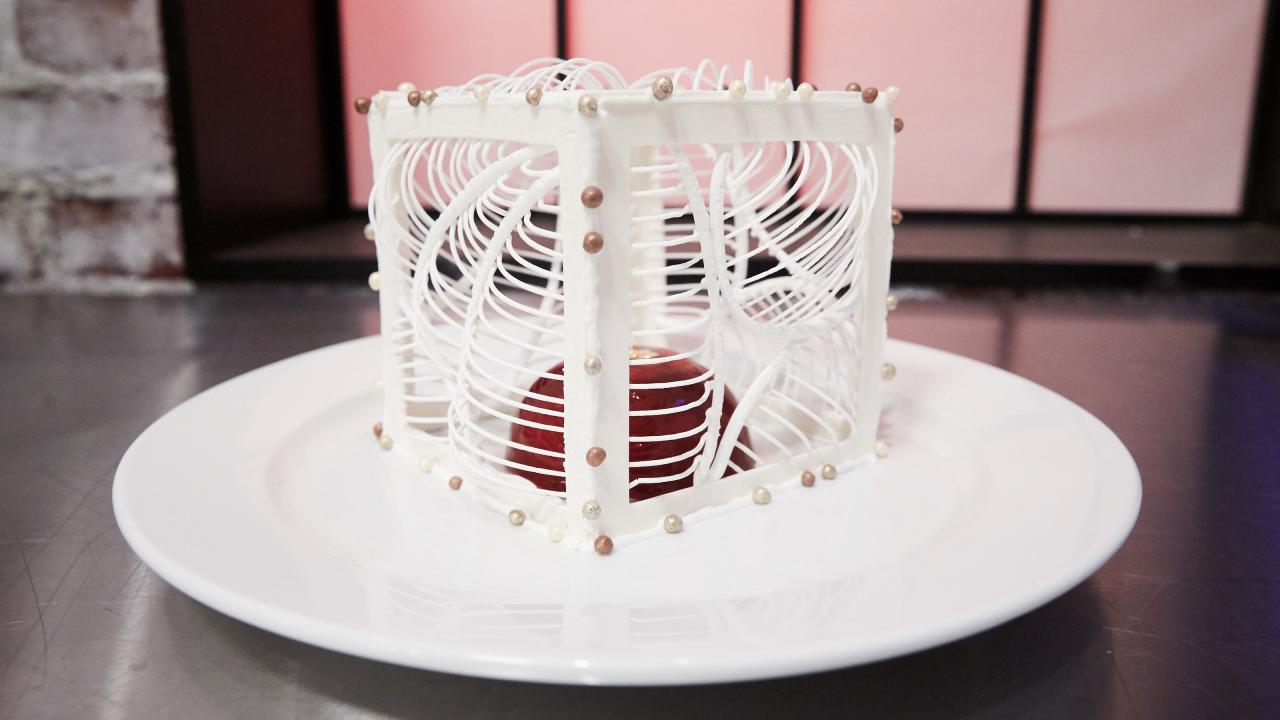
- Once all are dry, begin building the box. Set the entremet in the center of a dessert plate. Fill a cornet with Royal Icing and cut a 7-millimeter hole at the tip. Pipe a line of Royal Icing along the bottom edge of 2 frames. Set them around the entremet at a 90-degree angle and seal the seam where they are joined with more Royal Icing. Repeat with another 2 frames to build the walls surrounding the entremet. Pipe along the edges of one more frame piece and balance on the top of the walls to make a complete box. Pipe the seams and decorate with dragees. Allow to dry completely, about 2 hours, then serve.
White Chocolate Mousse:
- Put the chocolate, butter, vanilla and salt in the top of a double boiler (or heat-proof bowl over simmering water).
- In the bowl of a stand mixer fitted with a whisk attachment, whip the cream with 1 tablespoon of the granulated sugar until thick but still smooth. Scrape it into a bowl, put it in the fridge, then clean the stand mixer bowl and whisk really well.
- In the cleaned stand mixer bowl using the clean whisk attachment, whip the egg whites, lemon juice, and 1 tablespoon of the granulated sugar until you have a fluffy meringue, 7 to 10 minutes. Set aside at room temperature.
- Without cleaning the bowl, whip the egg yolks and remaining tablespoon sugar until light and fluffy. (This will take a few minutes, so go stir your chocolate. If it is melted, pull it off the heat and set it aside.)
- When the yolks are light, creamy yellow and fluffy and the chocolate is slightly warmer than room temperature, fold them together. Next, fold in the meringue, and finally, fold in the whipped cream.
Old School Sugar Cookies:
- In a big bowl, combine the butter, sugar, lemon zest, salt and vanilla and mix until smooth and fluffy. Stir in the baking powder, taking care to mix well. Add the eggs and egg yolk and stir well. Add the flours and gently stir until a smooth ball forms. Wrap the dough in plastic and put in the fridge for at least 1 hour.
- Preheat the oven to 375 degrees F and line a baking sheet (or sheets) with parchment paper (no cooking spray).
- On a floured surface, roll out tennis ball-size pieces of dough to about 1/4 inch thick and cut out the shapes you want, for the entremets use a 3 inch round cutter. Lay them on the prepared baking sheet, leaving at least 1/4 inch between each cookie.
- Bake for 8 minutes, or until lightly golden. Let the cookies cool on a wire rack.
- Adapted from "Duff Bakes: Think and Bake Like a Pro at Home" by Duff Goldman © William Morrow 2015. Provided courtesy of Duff Goldman. All rights reserved.
Glaze:
- Whisk together the gelatin and 1/3 cup water and set aside to bloom. Combine the sugar and 1 cup water in a small pot and bring to a boil. Remove from heat and whisk in the gelatin to dissolve.
- Pour over the chocolate, then allow to sit a minute. Add the condensed milk and emulsify with a hand blender. Color to the desired shade of red with red gel. Cool to 86 degrees F before pouring over the Entremet.
Royal Icing:
- Using a stand mixer and the whisk attachment, whip most of the powdered sugar with most of the other ingredients. Whip for 5 to 8 minutes, or until the royal icing holds its shape and is bright white (not translucent). If it is too soft, add more powdered sugar. If it is too stiff, add a bit more liquid, drop by drop. If you are using only one color, add a few drops of the color at this point and keep whipping until you have the shade you want; otherwise, proceed to the next step.
- To store royal icing, the ideal way is to scrape it out of the bowl and into a plastic, disposable piping bag, then leave it at room temperature. Don't cut the bag until you're ready to use the royal icing, and don't overfill the bag¿you want enough room to tie the back of the bag off to keep the royal icing airtight. If any air comes into contact with the royal icing, it gets hard and that part of the icing is useless. Never attempt to mix the hard bits back into the royal icing¿you'll ruin the whole batch. The other accepted method of storing royal icing is to scrape it into a plastic or ceramic bowl, and cover it with a wet paper towel. This method works, but it wastes both paper towels and royal icing. It's also just annoying. When you're piping small designs, you want to use very small parchment piping bags. It's easy to stick the nose of a large piping bag into a smaller one and extract exactly how much you'll need. When the icing is in a bowl, you have to use a spoon to get it out. The spoon is difficult to get into a piping bag, and you'll keep using spoons and wasting royal icing. Get with the times people. Do it right and don't waste food.
- Adapted from "Duff Bakes: Think and Bake Like a Pro at Home" by Duff Goldman © William Morrow 2015. Provided courtesy of Duff Goldman. All rights reserved.


