


Recipe courtesy of Jacques Torres
Eiffel Tower
Getting reviews...
- Level: Advanced
- Total: 2 hr
- Prep: 2 hr
- Yield: 4 servings
- Level: Advanced
- Total: 2 hr
- Prep: 2 hr
- Yield: 4 servings
Ingredients
Directions
Special equipment:
Aluminum flashing- Before you begin, keep 2 things in mind: First, you can make your Eiffel Tower any size you like, however there is a template is provided with this recipe that you should base your design on, and second, when using chocolate, be sure to work slowly and carefully. The first part of the tower you should make is the base. Spread the white chocolate on a parchment paper-lined work surface. When the chocolate is partially set, use an X-acto knife to cut a base that is large enough to accommodate the bottom of your tower. Using the template provided, cut the aluminum flashing into the shape of a side of the Eiffel Tower, being sure to make all of the cutouts. If you start with a small tower, you will have more success. Lay a parchment paper-lined sheet pan that is as large as your template on the work surface. Spread the bittersweet chocolate over the baking sheet. Make it thicker at 1 end (where you will place the bottom of the template) to create support for the height of the tower. When the chocolate is partially set, place the aluminum template on the chocolate and use an X-acto knife to trace it. Remove the template. Pick up the chocolate panel by the corners of the parchment paper and move onto a new sheet pan. Place a couple of rulers under the bottom of the chocolate panel, creating a curve at the bottom of your tower. Allow chocolate to set. When set, peel up the tower panel from the parchment paper, freeing it from the excess chocolate surrounding it. Cut 3 more tower panels using the same process. Make sure the curves in each piece are the same or your tower will not work. The next step is to assemble the tower, however assembly will be easier if you enlist the help of a friend. Place the base on your work surface. Use bittersweet chocolate to "glue" the bottom half of two sides together creating a 90-degree angle, or one corner of the tower. "Glue" them onto the base. When the chocolate sets, "glue" the other two sides together and attach them to the base. Using a coronet, apply more chocolate on the bottom half of all of the seams to reinforce the tower. When that chocolate sets, go back and gently seal the tops of the tower sides with more bittersweet chocolate. Decorate the outside of the tower with a cornet filled with white chocolate.
- How to Temper Chocolate(From Dessert Circus, Extraordinary Desserts You Can Make At Home by Jacques Torres):
- Chocolate is tempered so that after it has been melted, it retains its gloss and hardens again without becoming chalky and white (that happens when the molecules of fat separate and form on top of the chocolate). There are a variety of ways to temper. One of the easiest ways to temper chocolate is to chop it into small pieces and then place it in the microwave for 30 seconds at a time on high power until most of the chocolate is melted. Be very careful not to overheat it. (The temperature of dark chocolate should be between 88 and 90 degrees F, slightly warmer than your bottom lip. It will retain its shape even when mostly melted. White and milk chocolates melt at a temperature approximately 2 degrees F less because of the amount of lactose they contain.) Any remaining lumps will melt in the chocolate's residual heat. Use an immersion blender or whisk to break up the lumps. Usually, chocolate begins to set, or crystallize, along the side of the bowl. As it sets, mix those crystals into the melted chocolate to temper it. A glass bowl retains heat well and keeps the chocolate tempered longer. Another way to temper chocolate is called seeding. In this method, add small pieces of unmelted chocolate to melted chocolate. The amount of unmelted chocolate to be added depends on the temperature of the melted chocolate, but is usually 1/4 of the total amount. It is easiest to use an immersion blender for this, or a whisk. The classic way to temper chocolate is called tabliering. Two thirds of the melted chocolate is poured onto a marble or another cold work surface. The chocolate is spread out and worked with a spatula until its temperature is approximately 81 degrees F. At this stage, it is thick and begins to set. This tempered chocolate is then added to the remaining non-tempered chocolate and mixed thoroughly until the mass has a completely uniform temperature. If the temperature is still too high, part of the chocolate is worked further on the cold surface until the correct temperature is reached. This is a lot of work, requires a lot of room, and makes a big mess. A simple method of checking tempering, is to apply a small quantity of chocolate to a piece of paper or to the point of a knife. If the chocolate has been correctly tempered, it will harden evenly and show a good gloss within a few minutes.
Looking for Something Else?


Related Pages
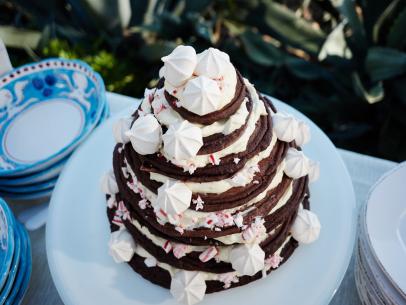
- Chocolate Candy Cane Tower Recipe
- Candy Corn Cheese Tower Recipe
- Saucy Eggplant Patty Tower Recipe
- Portobello Steak and Scallion Potato Tower Recipe
- Tortilla Tower Recipe
- Tuna Timbale Tower Recipe
- BBQ Tower Recipe
- Le Creuset Eiffel Tower Collection
- How Long Is the Humble Baron, The World's Longest...