


Recipe courtesy of Food Network Kitchen
Recipe courtesy of Food Network Kitchen
Watch how to make this recipe.
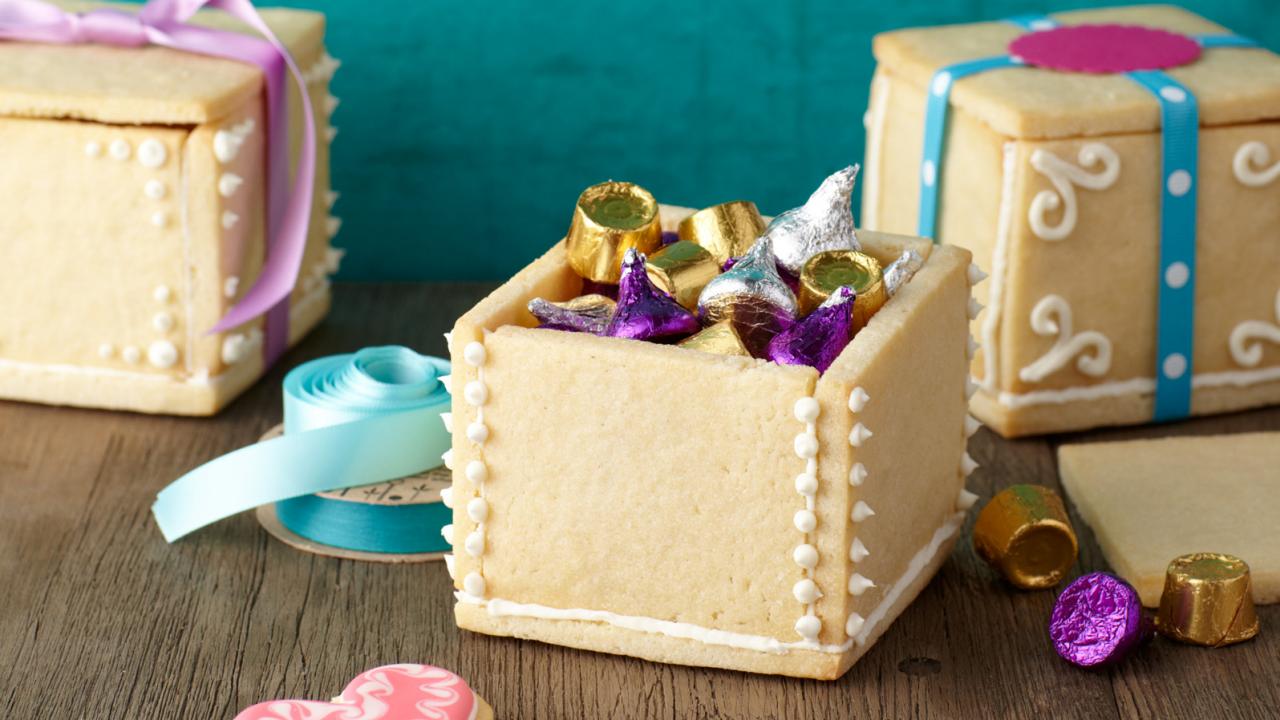
Edible Gift Boxes
Getting reviews...
- Level: Intermediate
- Total: 1 day 5 hr 30 min (includes drying time)
- Active: 2 hr
- Yield: 4 boxes
-
- Nutritional Analysis
- Per Serving
- Serving Size
- 1 of 22 servings
- Calories
- 336
- Total Fat
- 13 g
- Saturated Fat
- 8 g
- Carbohydrates
- 52 g
- Dietary Fiber
- 1 g
- Sugar
- 33 g
- Protein
- 3 g
- Cholesterol
- 50 mg
- Sodium
- 51 mg
Become a craftsman with cookie dough and build these edible boxes for someone special. The sky is the limit for decorating and what goes inside.
- Level: Intermediate
- Total: 1 day 5 hr 30 min (includes drying time)
- Active: 2 hr
- Yield: 4 boxes
-
- Nutritional Analysis
- Per Serving
- Serving Size
- 1 of 22 servings
- Calories
- 336
- Total Fat
- 13 g
- Saturated Fat
- 8 g
- Carbohydrates
- 52 g
- Dietary Fiber
- 1 g
- Sugar
- 33 g
- Protein
- 3 g
- Cholesterol
- 50 mg
- Sodium
- 51 mg
Ingredients
Sugar Dough:
Royal Icing:
Directions

Special equipment:
ruler, scissors, pizza cutter, cookie cutters, disposable pastry bags, small and medium decorating tips- For the dough: Whisk together the flour, baking soda and salt in a medium bowl. Beat together the eggs and vanilla in a small bowl.
- Beat the butter, granulated sugar and confectioners' sugar together, in a large bowl, with an electric mixer on low speed. Once incorporated, increase the speed to medium, and beat until slightly creamy, about 3 minutes. Stop and scrape down the sides of the bowl as needed.
- Reduce the speed to low again and slowly pour in the egg mixture and beat until combined. Add the flour mixture, in 3 additions, increase the speed as the dough gets thicker to keep the beaters spinning. Scrape down the sides of the bowl and the beaters themselves as needed. Once all the flour is just incorporated, increase the speed to medium-high and beat until the dough is very smooth, about 5 minutes.
- Turn the dough out of the bowl and bring it together. Divide into 4 even pieces (about 11 ounces). Shape each piece into a flat square and wrap in plastic wrap. Refrigerate the dough for at least 3 hours or overnight.
- To roll, cut and bake the cookies: Position racks in the upper and lower thirds of the oven, and preheat to 350 degrees F. Line 2 baking sheets with parchment.
- Dust another sheet of parchment paper with flour and put 1 piece of the dough on top. Dust with more flour and top with another sheet of parchment. Roll the dough out into a square about 1/4-inch thick and chill until firm, about 20 minutes. Repeat with the remaining 3 pieces of dough.
- From 1 piece of rolled dough, measure and cut 6 panels for a box: two 4- by 4-inch squares for the top and bottom, two 4- by 2-inch rectangles for the long sides and two 3 3/4- by 2-inch rectangles for the slightly shorter sides. Arrange on the prepared baking sheets, cover and refrigerate. Repeat with the remaining 3 pieces of dough. If you find you can't get all the box parts from a piece then gather the scraps, reroll and cut panels from that.
- Bake, rotating the baking sheets front to back and bottom to top about halfway through, until golden brown around the edges, about 20 minutes. Let cool completely on the baking sheets on a cooling rack, about 30 minutes. Nice, straight sides make the boxes easier to assemble, so after cooling, use a fine kitchen rasp to file the edges until squared and straight.
- Meanwhile, make the royal icing: Combine the confectioners' sugar and meringue powder in a large bowl. Add 5 tablespoons water and the vanilla and beat with an electric mixer on medium-high speed until the icing forms thick and glossy peaks, about 2 minutes (adding up to 1 tablespoon more water, if needed). Remove 2 cups to thicken and transfer the rest into an airtight container with plastic wrap pressed on to the surface of the icing.
- Thicken the royal icing: Thicken the 2 cups of the royal icing by beating in tablespoons of extra confectioners' sugar until the mixture is the consistency of caulk. Fit a pastry bag with a medium round tip and fill it with the thickened icing.
- Build the boxes: Put a 4- by 4-inch panel flat-side up on a work surface and pipe the thickened icing around the perimeter. Push a long edge of a 4- by 2-inch side panel into the icing on any side you'd like (make sure the golden top is facing out). You can use a can to help prop the panel up. Push the other 4- by 2-inch side panel directly opposite of the first. Now do the same with the remaining 3 3/4-inch by 2-inch side panels. Pipe more thickened royal icing up the 4 corners to help the side panels adhere to one another. Then pipe some around the top perimeter of the box. Let the boxes dry for 24 hours before adding the decorations.
- When dry, use a paring knife to trim off excess overflowing icing so the outside of the box has a clean finish.
- Decorate: Fit small round tips into piping bags. Divide the remaining royal icing into batches and color as desired. Fill bags with icing and pipe neat lines along the seams of the box first. Then go back and pipe little dots along the piped lines to create more interest. At this point, you can decorate the box and lid however you want. Do some pencil sketches on paper first to get an idea of what you might like. Then go for it.
- Let the icing dry thoroughly for at least 24 hours. Fill with treats of your choosing, tie with a ribbon and present.
Cook’s Note
When measuring flour, we spoon it into a dry measuring cup and level off excess. (Scooping directly from the bag compacts the flour, resulting in dry baked goods.)
Looking for Something Else?


Related Pages
- Bacon, Egg and Cheese Bread Boxes Recipe
- Tuna Melt Bread Boxes Recipe
- Pastrami Reuben Bread Boxes Recipe
- Cubano Bread Boxes Recipe
- Philly Cheese Steak Bread Boxes Recipe
- Edible, Eggless Chocolate Chip Cookie Dough Recipe
- Edible Birthday Cake Cookie Dough Recipe
- Cheese-Filled Edible Gift Boxes Recipe
- Grilled Edible Cheeseboard Recipe