Recipe courtesy of Jacques Torres
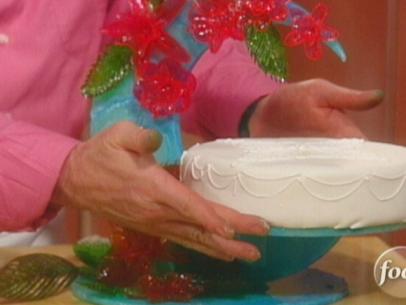
Pate a Choux Centerpiece
Getting reviews...
- Level: Advanced
- Total: 1 hr 40 min
- Prep: 1 hr
- Cook: 40 min
- Yield: 1 centerpiece
- Level: Advanced
- Total: 1 hr 40 min
- Prep: 1 hr
- Cook: 40 min
- Yield: 1 centerpiece
Ingredients
For the pate a choux:
For the caramel:
Directions
- How to Make a Cornet, method follows
- Make the centerpiece: Use a marker to trace the shapes of the centerpiece on a sheet of parchment paper in a sheet pan. Depending on how well you space your drawing for the entire centerpiece, you will need 4 to 5 set ups of parchment paper lined sheet pans. Starting with the centerpiece layers, draw 3 round bases of gradual size: draw the first circle 8 inches in diameter, the second circle about 5 inches in diameter and the third circle about 3 inches in diameter. Fill each circle by drawing a crosshatch pattern spacing your lines 1/2 to 3/4-inch apart. Turn the traced paper over so the ink does not transfer to the pate a choux. Place the pate a choux in a piping bag with a 1/4-inch straight tip and trace the base shapes you drew.
- To make the supports for the base: Using the same technique used to trace the 3 round bases, draw 5 curled lines that resemble a decorative letter S about 6 inches tall. These will sit between the largest and middle-sized base. Then make the same shape in a smaller size, about 3 inches tall, you will need 3 of the smaller S shapes. Turn the traced paper over so the ink does not transfer to the pate a choux. Trace the S shapes with the piping bag filled with the pate a choux.
- To make the butterflies: begin by making the butterfly wings, draw the shape of a teardrop about 2 1/2 to 3 inches long. Draw a second tear drop, the same size as the first, they should be connected, round end to round end in order to create a wing shape. Draw 10 sets of wings, this will give you 5 butterflies. Place more pate a choux in a paper cornet (see How to Make a Cornet). Trim the tip so you can draw a very fine line. Trace the outline of the butterfly wings with the pate a choux. Then, in a freeform style, draw a narrower teardrop shape within the boundaries of each of the larger teardrops. Make sure the smaller teardrops connect with the larger teardrops at both ends. To make the body of the butterfly, using the same cornet, pipe 2-inch strips making a thick end (the head) and gradually tapering off. To make the antennae simply pipe a 1 1/2-inch V shape. You will need 5 sets of bodies and 5 sets of antennae.
- Bake the pate a choux in the oven at 320 degrees F for about 20 minutes.
- How to Make a Cornet:
- The Cornet: A cornet is a small piping bag made from parchment paper. It is usually used to make fine decorations.
- Cut an 8 by 12 by 14 1/2-inch triangle from a sheet of parchment paper.
- Hold the middle of the long side of the triangle between 2 fingers of 1 hand. Take the tip of the triangle on the short, wide end and roll it toward the other tip of that same end while simultaneously pulling it in an upward motion. The tip of a cone will form where your thumb and finger hold it on the long side.
- Release your grip from the long side, so that you are now holding the 2 corners where they meet. The paper will already resemble a partially formed cone.
- Roll the remaining tail until it is completely rolled into a cone. There will be 1 point sticking up from the open end. Fold it inside toward the center, and crease the fold. Now you should have a cornet.
- To close the cornet once it has been filled, fold it away from the seam; this will keep the seam from opening. Use a pair of scissors or a sharp paring knife to cut an opening at the tip of the cornet to the desired size.
- Prepare the pate a choux: Place the water, salt, granulated sugar, and butter in a 4-quart heavy-bottomed saucepan, set it over medium-high heat, and bring to a boil. The butter should be completely melted by the time the mixture boils. Remove the saucepan from the heat. Add the bread flour all at once and incorporate it thoroughly with a wooden spoon.
- Return the saucepan to the stove and cook over medium heat for about 3 minutes to dry out the paste. As it cooks, push the paste from side to side with the wooden spoon. Turn it onto itself to allow every side to touch the bottom of the saucepan, which helps it dry. Keep the paste moving, or it will burn. The paste will dry out and leave a thin film on the bottom of the saucepan.
- Remove the saucepan from the heat and transfer the paste to a large mixing bowl. Mix with an electric mixer set on low speed for about 2 minutes to release some of the steam. Continue to mix and slowly add the eggs 1 at a time, incorporating well after each addition. After each egg is added, the paste will become loose and look separated. Once each egg is well incorporated, the paste will become smooth again. The number of eggs used will vary depending on the size of the eggs and how well the pate a choux is dried. The drier it is, the more eggs you will need. After you have added 2 eggs, check the consistency by scooping a large amount of the paste onto a wooden spoon. Hold the spoon horizontally about 1foot above the bowl and watch as the batter falls from the spoon back into the bowl. If it is pale yellow, smooth, moist, slightly elastic, sticky, and takes 5 to 7 seconds to fall into the bowl, it is ready. If it appears rough, dry, and falls into the bowl in 1 big ball, it needs more eggs. Add another egg and check the consistency again after it is well incorporated.
- To make the caramel: Place the sugar, corn syrup and water in a 1-quart heavy-bottomed saucepan and cook over medium-high heat until light golden brown. Pour the caramel into a heatproof bowl to hold the temperature of the sugar. Put a towel under the bowl to keep it from tipping and to protect your hands from the heat of the glass.
- Assemble the centerpiece: The caramel acts as glue. Dip the bottom of the first large S into the caramel and stick it to the largest base going from the out side rim of the circle, towards the center of the circle. In other words, the base supports should almost meet each other in the center of the circle. This creates a structure for the next layer to rest on. You will have to hold each S support in place in order for the caramel to harden and actually stick, keeping the S shape in the right position. Repeat using the other 4 pieces, spacing them evenly. Dip the bottom of the first small S into the caramel and stick it to the medium-sized base. Repeat using the other pieces, again spacing them evenly. Place the medium size base on the large S supports. Top the small S supports with the smallest base. You will have a 3 tiered structure.
- To assemble the butterflies: using the caramel as glue, connect 2 sets of the wings together. Do this along length of the wings. Adjust the wings to sit at a slight angle, as though the wings are in mid-flight. Do this with all 10 wing sets, creating 5 total butterflies. Using a paring knife dipped in the caramel to spread it might be easier than dipping the wings or bodies in the bowl of caramel. You may need to prop the wings up while they harden. You can do so using 2 rolling pins or 2 thick books lying with about 2 inches between them. The space between them is where the glued center juncture will rest on the work surface and you will be able let the wings harden on a slight angle; this way you will not have to hold them in place until they harden. Using more caramel, glue the bodies to the area where you glued the wings together. Place the fatter end of the body at the top section where the wings are joined. Glue the antenna to the fatter part of the bodies. If at some point during the gluing process the caramel has become to stiff to use; place the caramel in the microwave oven at 30-second intervals, until it loosens up for you to use it again. Once the butterflies have been assembled and the caramel has hardened, you can then glue them wherever you like on the 3-tiered centerpiece.
- Place the centerpiece on a large tray. Display the Bomboloni and the Cloud Puffs around the centerpiece. Voila!