Recipe courtesy of Amy Scherber
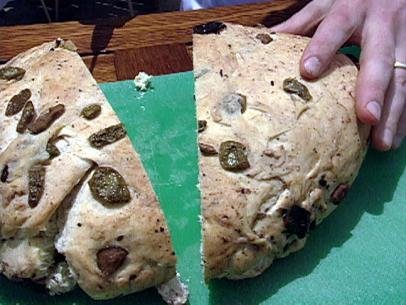
Olive Bread
Getting reviews...
- Level: Intermediate
- Total: 1 hr 2 min
- Prep: 20 min
- Inactive: 12 min
- Cook: 30 min
- Yield: 8 to 10 servings
- Level: Intermediate
- Total: 1 hr 2 min
- Prep: 20 min
- Inactive: 12 min
- Cook: 30 min
- Yield: 8 to 10 servings
Ingredients
Sponge Starter:
Dough:
Directions
- To make the sponge, place the yeast and water into a medium sized bowl, and stir to dissolve yeast. Add the flour and stir vigorously with a wooden spoon or your hands for 2 to 3 minutes, until smooth, until a somewhat elastic dough has formed. The starter will be thick and stretchy.
- Scrape the starter into a clear container with high sides and cover with plastic wrap, and let it rise.
- At this point you have two options. If you plan to make the dough later the same day, let the sponge rise at room temperature until it has risen to the point where it just begins to indent on top. This may take 6 to 8 hours. It will triple in volume and very small dents and folds will begin to appear in the top of the surface as it reaches its peak and begins to deflate. Make sure to use it before it sinks too much.
- If you are not planning to make the dough until the next day, let the sponge rise for 1 hour after mixing, then place it in the refrigerator and let it rise for at least 14 hours before taking it out to use. Be sure to compensate for the cold temperature of the starter by using warm water in the dough, or let it sit out, covered, until it reaches room temperature.
- To make the dough, place the yeast and water in a large bowl. Stir the yeast so it dissolves, and allow to stand for 1 minute.
- Add the sponge to the yeast mixture, and mix with your hands for 1 minute to break up the sponge. The mixture should be foamy. Add the flour and mix it in with your hands, lifting the wet mixture over the flour to incorporate it. Once the dough becomes a shaggy mass, knead in the bowl for 1 minute. Cover with plastic wrap and let rest for 20 minutes.
- Add the salt to the dough and knead briefly to incorporate. Gradually add the oil and milk, and knead gently until all the liquid has been incorporated.
- Move the dough to a lightly floured work surface and knead until it begins to become smooth, approximately 2 to 3 minutes. The dough will be sticky, so keep the work surface lightly floured.
- Place the dough in a lightly oiled bowl, turn the dough to coat it, and cover with plastic wrap. Let the dough rise until almost double in size, approximately 2 hours.
- To make the olive bread, place the dough on a lightly floured surface, spread the dough out gently, and then spread the chopped olives all over the surface. Roll the dough up, and let it rest for 1 hour.
- Line 2 (8-inch square) pans with parchment brushed with olive oil.
- When the dough has risen, loosen it from the bowl with lightly floured hands, and pour it onto a floured surface. Divide the dough into 3 equal pieces. Shape each piece into log shapes, pressing the olives into the dough, and sealing the seams. Place on a floured cloth to rise for 1 to 2 1/2 hours.
- Preheat oven to 425 degrees F.
- Place the loaves onto a peel coated with cornmeal and slide onto a preheated baking stone, or place the loaves onto a baking sheet covered with parchment paper, and place it in the oven. Mist the loaves with water from a spray bottle, and shut the oven door. Mist again 1 minute later.
- Bake for 15 minutes, then reduce heat to 350 degrees F, and bake for 15 to 25 minutes longer, or until golden brown and crusty.
- Remove the olive bread from the oven immediately and let cool on a cooling rack.
- This recipe was provided by professional chefs and has been scaled down from a bulk recipe provided by a restaurant. The FN chefs have not tested this recipe, in the proportions indicated, and therefore, we cannot make any representation as to the results.