


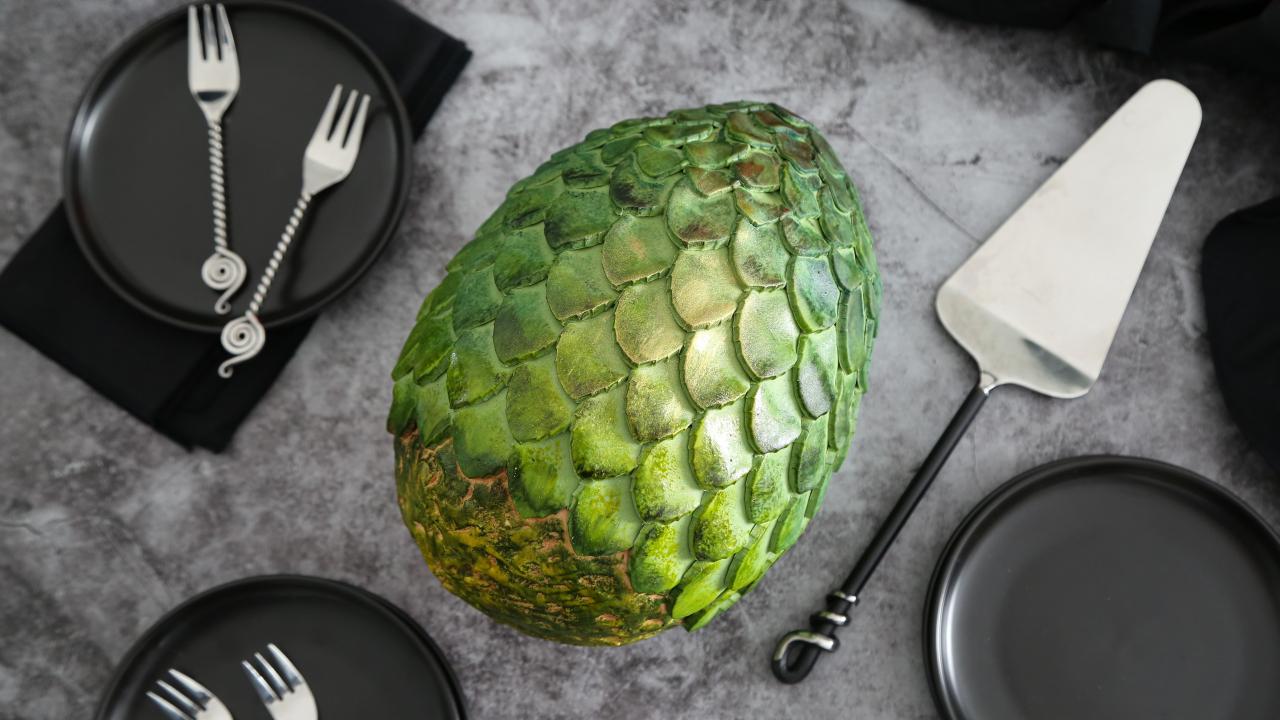

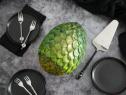
Dragon Egg Cake
- Level: Advanced
- Total: 3 hr 45 min (includes cooling and chilling times)
- Active: 1 hr 30 min
- Yield: 10 servings
- Level: Advanced
- Total: 3 hr 45 min (includes cooling and chilling times)
- Active: 1 hr 30 min
- Yield: 10 servings
Ingredients
Egg Cake:
Simple Syrup:
Vanilla Buttercream:
Marshmallow Fondant and Décor:
Directions
Special equipment:
a 6-by-9-inch 3D egg cake pan; a pastry brush; a 9-inch cake board or serving plate; a 2-inch serrated leaf fondant cutter; a fondant rolling pin (see Cook's Note); a 6-inch pastry cutter (or 6-inch dessert plate for template); 3 to 4 kitchen-dedicated paintbrushes or soft-bristle art brushes; a food-dedicated 3-inch round sponge- For the egg cake: Preheat the oven to 350 degrees F. Grease and lightly flour a 6-by-9-inch 3D egg cake pan.
- In the bowl of an electric mixer fitted with the paddle attachment, cream the butter and granulated sugar until lightened in color and fluffy, 4 to 5 minutes. Add the eggs one at a time, mixing well after each addition. Mix in the vanilla extract.
- Sift together the flour, baking powder and salt in a separate bowl. Add the flour mixture to the butter mixture in 3 additions, alternating with the milk; begin and end with the flour mixture. Beat until the batter is smooth and thoroughly combined.
- Divide the batter among 3 bowls. Tint one bowl with the red food color, one with the orange and one with the yellow. Fill each half of the egg pan alternately with the batter colors. Use a butter knife or skewer to swirl the batter together.
- Bake until a toothpick tester inserted near the center comes out clean, about 1 hour. Transfer the cakes to wire cooling racks and let them cool completely before frosting. When the cakes are cool, level them with a serrated knife, if needed.
- For the simple syrup: Combine the granulated sugar and 1 cup water in a small saucepan. Heat over medium-high heat, stirring constantly, until the sugar is dissolved. Remove from the heat and stir in the vanilla extract. Let cool for about 15 minutes before using.
- Place the cakes dome-side up on a wire rack or baking sheet. Use a pastry brush to coat the cakes with the simple syrup. Use about two-thirds of the syrup on the cakes and reserve the remaining syrup for later use.
- For the vanilla buttercream: In the bowl of an electric mixer fitted with the whip attachment, cream together the butter and confectioners' sugar on low speed until crumbly. Add the vanilla extract. Beat again, adding milk or cream 1 tablespoon at a time to thin the mixture. When the mixture starts to appear creamy, increase the mixer speed to high and beat until light and fluffy. Add more milk or cream to bring to spreading consistency.
- Place one egg cake on a 9-inch cake board or serving plate dome-side down. Cover with a thick layer of buttercream and sandwich with the second egg cake, dome-side up. Use the buttercream to completely cover the outside of the egg cake, smoothing it as much as possible with an offset spatula. This doesn’t have to be perfect because the cake will be covered with fondant dragon scales. Refrigerate the cake until the buttercream is firm, about 20 minutes.
- For the marshmallow fondant and décor: In a large microwave-safe bowl, combine the marshmallows and 1 tablespoon plus 1 teaspoon water. Microwave in 30-second intervals until the marshmallows have expanded to twice their size, 60 to 90 seconds total. Stir to deflate.
- Add one-third of the confectioners' sugar into the marshmallow mixture and stir to combine. Add more confectioners’ sugar and stir until very stiff. When the mixture becomes difficult to stir, knead with your hands. Add the remaining confectioners’ sugar a little at a time, until the fondant is very smooth and elastic and holds a firm ball shape.
- Remove a third of the fondant to a work surface and cover the remaining fondant with plastic wrap to prevent drying. Dust the work surface with confectioners’ sugar. Knead a few drops of brown gel food color into the portion until a light tan is achieved. If the fondant feels too dry, knead in 1/2 tablespoon of vegetable shortening. Wrap tightly in plastic wrap and set aside to rest.
- Re-dust the work surface with confectioners’ sugar. Knead the remaining fondant with 1/4 teaspoon moss green gel food color until a consistent green hue is achieved. Roll the fondant to 1/8-inch thickness using a fondant rolling pin. Use a 2-inch fondant serrated leaf cutter to stamp as many ‘dragon scales’ from the fondant as possible. Transfer the scales to baking sheets lined with parchment paper and cover with plastic wrap so they don’t dry out. Re-roll the fondant and cut more scales. Repeat the process until all of the fondant is used.
- Roll out the tan fondant to 1/4-inch thickness and cut out a 6-inch circle with a 6-inch pastry cutter (or use a dessert plate as a template). Use a kitchen-dedicated paintbrush to lightly coat one side of the fondant with the simple syrup and then press it onto the bottom rounded part of the egg. Use the end of the paintbrush to pock the fondant. Use a butter knife to scrape irregular markings into the fondant to create a distressed appearance.
- Use the paintbrush to apply a small amount of simple syrup to the back of a fondant scale. Place the scale halfway over the edge of the 6-inch round of fondant. Repeat the process, overlapping the scales slightly. After the first row of scales is applied, begin the second row by placing a scale’s point between 2 scales of the first row. Repeat the process of brushing, applying and overlapping scales until the entire cake is covered.
- In 3 separate small cups, combine each of these food colors with a few drops of clear extract: emerald green, moss green and neon yellow. Lightly dip a clean brush into the emerald green food color mixture. Brush it onto the top third of the scaled portion of the cake. Dampen a food-dedicated 3-inch round sponge with water and wring out completely. Use the sponge to tap the color into the fondant, so that it has a mottled appearance. Repeat the process with the moss green food color on the middle third of the scales, followed by the yellow on the bottom third of the scales. Use the sponge to mottle color onto the distressed tan fondant. Use every color to create lots of color variation. Refrigerate the cake until the color is set and dry, about 15 minutes.
- Dip a dry soft-bristle paintbrush into the gold luster dust. Lightly brush over the scales to create a metallic shine.
- Slice the cake in front of your guests to reveal the fiery interior--then ENJOY!
Cook’s Note
Fondant rolling pins are completely smooth and ideal for leaving fondant with a smooth surface. If you don’t have one, you can use a regular rolling pin. However, avoid wooden rolling pins that have a grained surface. Be sure to use edible gold luster dust on this cake. Not all color dusts are edible. Make sure the manufacturer clearly states on the jar that the product is edible.