


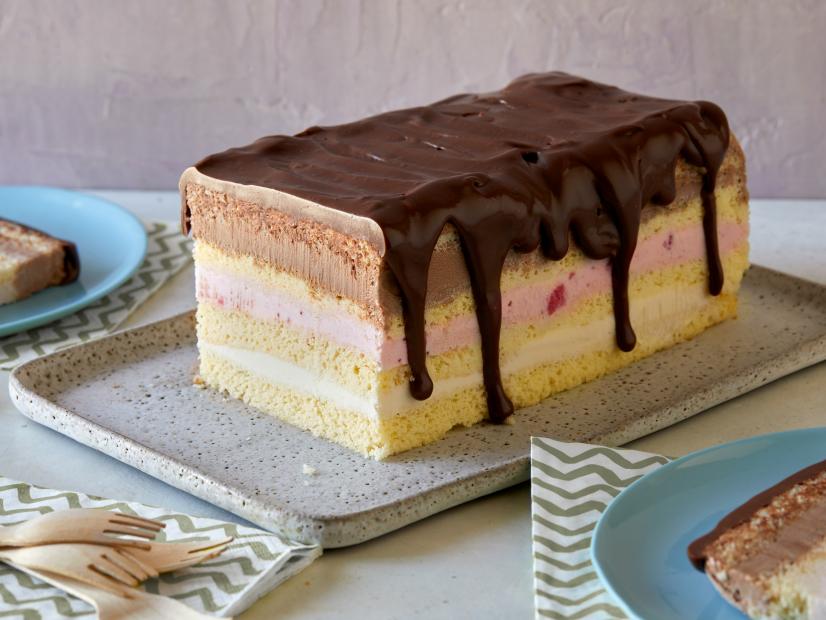
Sheet Pan Ice Cream Cake
- Level: Easy
- Total: 50 min
- Active: 30 min
- Yield: 8 to 10 servings
-
- Nutritional Analysis
- Per Serving
- Serving Size
- 1 of 10 servings
- Calories
- 500
- Total Fat
- 25 g
- Saturated Fat
- 16 g
- Carbohydrates
- 63 g
- Dietary Fiber
- 2 g
- Sugar
- 39 g
- Protein
- 8 g
- Cholesterol
- 127 mg
- Sodium
- 313 mg
Ingredients
Directions
Special equipment:
a 10-by-5-by-3-inch loaf pan- Position an oven rack in the center of the oven and preheat to 375 degrees F. Lightly coat an 18-by-13-inch sheet pan with nonstick baking spray. Line the bottom with parchment. Set aside.
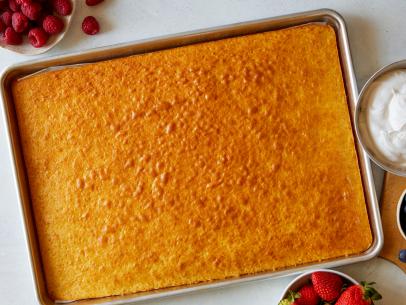
- Beat the eggs, sugar, baking powder and salt in a stand mixer fitted with a whisk attachment on high speed until the mixture is pale and very thick (enough to hold a wake from the whisk), about 10 minutes (see Cook's Note). Reduce the speed to medium-high and drizzle in the butter and vanilla until just combined, about 10 seconds. Reduce the speed to low and add the flour all at once. Beat until just combined, about 5 seconds. Gently fold the batter once or twice using a rubber spatula, then scrape it into the prepared sheet pan. Spread it evenly with the spatula, using broad, gentle strokes to keep the batter airy.
- Bake, rotating the pan halfway through, until the top is lightly golden, 15 to 18 minutes. Transfer to a wire rack and allow the cake to completely cool in the sheet pan.
- Remove the ice cream from the freezer about 15 minutes before assembling the cake to soften.
- Use a sharp paring knife to cut the cake into 3 rectangles,, approximately 9 1/2 -by-4 1/2 inches. Reserve the remaining cake trimmings for the last layer.
- Line the inside of a 10-by-5-by-3-inch loaf pan with plastic wrap, leaving enough overhang to cover the pan once the cake is fully assembled.
- Layer the bottom of the loaf pan with 1 cake rectangle, gently pushing it down to fit and trimming as needed. Spread the chocolate ice cream evenly over the cake using a rubber spatula. Continue layering with the remaining 2 cake rectangles and the strawberry and vanilla ice cream. Use the reserved cake trimmings for the top layer, cutting them to fit. Gently press down on each cake layer to fill in gaps as you go.
- Cover the top of the cake with the overhanging plastic wrap and freeze until firm, at least 4 hours and up to 12 hours.]
- When ready to serve, place the chocolate and coconut oil in a glass small bowl. Microwave in 20 second intervals, stirring with a rubber spatula, until completely melted and smooth. Set aside. (Alternatively, place the chocolate and coconut oil in a small saucepan and cook over medium-low heat, stirring occasionally with a rubber spatula, about 4 minutes.)
- Remove the plastic wrap overhang from the top of the loaf pan and flip the pan onto a serving platter. Lift to remove the pan, then gently peel the plastic wrap from the cake. If the cake will not release, allow it to sit (top side up) for 5 minutes, then gently tug on the plastic wrap to lift the cake from the pan.
- Pour the chocolate shell over the top of the ice cream cake, allowing some to drip down the sides. Slice to serve.
Cook’s Note
The eggs should be very cold; preferably keep them in the refrigerator until they are ready to be whisked. Cold eggs help minimize the risk of over-whipping and ensure that the cake is airy yet stable. Make sure to beat the egg mixture the full 10 minutes. Aerating the eggs until they are foamy and hold their shape helps leaven this cake and gives it structure. When measuring flour, we spoon it into a dry measurement cup and level off excess. Scooping directly from the bag compacts the flour, resulting in dry baked goods.
Looking for Something Else?


Related Pages
- Strawberry Crunch Ice Cream Cake Recipe
- Ice Cream Crunch Cake Recipe
- Strawberries and Cream Ice Cream Cake Recipe
- Mint and Chocolate Ice Cream Cake Recipe
- Rocky Road Ice Cream Cake Recipe
- American Flag Ice Cream Cake Recipe
- Unicorn Ice Cream Cake Recipe
- Oreo Mint Chip Ice Cream Cake Recipe
- Mango-Orange-Vanilla Ice Cream Cake Recipe