


Recipe courtesy of
Kayla Hoang
for
Food Network Kitchen
Recipe courtesy of
Kayla Hoang
for
Food Network Kitchen
Watch how to make this recipe.
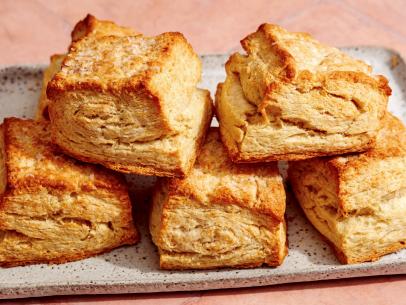
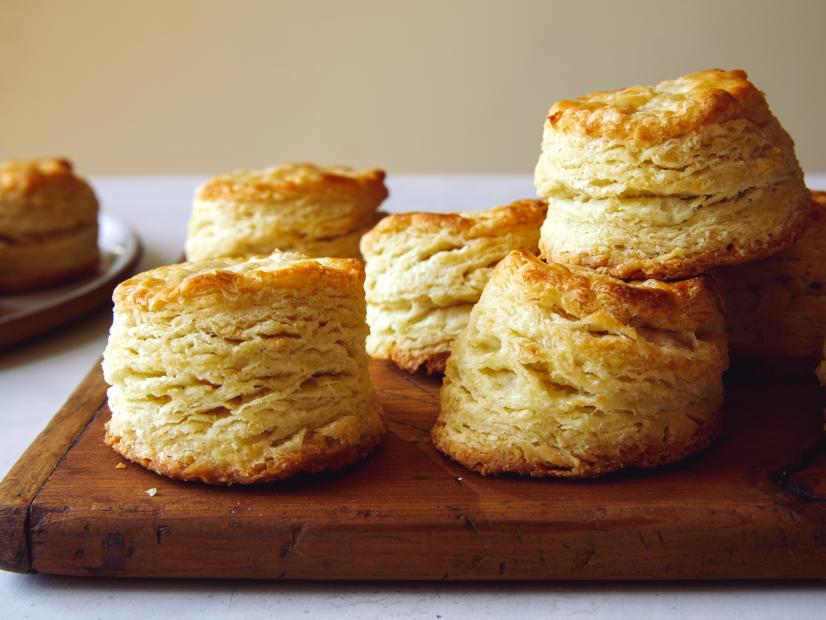
Super-Layered Biscuits
Getting reviews...
- Level: Intermediate
- Total: 1 hr 15 min (includes chilling time)
- Active: 40 min
- Yield: 12 biscuits
-
- Nutritional Analysis
- Per Serving
- Serving Size
- 1 of 12 servings
- Calories
- 339
- Total Fat
- 21 g
- Saturated Fat
- 13 g
- Carbohydrates
- 33 g
- Dietary Fiber
- 1 g
- Sugar
- 3 g
- Protein
- 5 g
- Cholesterol
- 55 mg
- Sodium
- 264 mg
These buttermilk biscuits taste like the classic, but their irresistibly lofty pull-apart layers set them above the rest. We achieved the fluffy interior with a few simple tricks. We used grated frozen butter because it is quicker and easier to incorporate into the dry ingredients than big chunks. This keeps the butter cold longer, which translates into flakier biscuits. While many recipes rely on a folding technique to create layers, cutting and stacking lessens the gluten development, making the dough easier to work with and the layers a better consistency. And dusting each piece of dough with flour before stacking (similar to the technique for paratha) creates definition between the layers.
- Level: Intermediate
- Total: 1 hr 15 min (includes chilling time)
- Active: 40 min
- Yield: 12 biscuits
-
- Nutritional Analysis
- Per Serving
- Serving Size
- 1 of 12 servings
- Calories
- 339
- Total Fat
- 21 g
- Saturated Fat
- 13 g
- Carbohydrates
- 33 g
- Dietary Fiber
- 1 g
- Sugar
- 3 g
- Protein
- 5 g
- Cholesterol
- 55 mg
- Sodium
- 264 mg
Ingredients
Directions
- Whisk together the flour, baking powder, sugar, salt and baking soda in a large bowl. Grate the butter using the large holes of a box grater and add to the flour mixture. Quickly toss the butter with the flour mixture by hand until the butter is evenly distributed and coated with flour. Slowly drizzle the buttermilk over the flour mixture, using a fork to incorporate, until the mixture comes together in a shaggy dough. (There may be some dry bits remaining; don’t overmix.)
- Turn the dough out onto a cutting board or work surface (the dough does not need to be floured at this point or for the first round of layers). Pat the dough into a 1/2-inch-thick rectangle, about 12 inches by 8 inches, using a bench scraper, bowl scraper or ruler to keep the edges straight. Cut the dough into 6 even pieces using a sharp knife and stack the pieces on top of each other, making sure to line up the edges. If any large bits of dough come off, gently press them back while taking care to maintain the shape and even thickness. Any small bits of dough that fall off can be tucked away between the stacked pieces. This creates the first set of layers. The dough may seem like it's not hydrated enough, but it will come together.
- Lightly dust the work surface and stack of dough with flour. Use a rolling pin to press the stack down and roll out back to a 1/2-inch-thick rectangle, about 12 inches by 8 inches, making sure the layers of dough stay lined up and even with one another (see Cook's Note). Dust the surface of the dough once more lightly with flour. This helps to provide definition between the layers. Cut the dough once more into 6 even pieces and stack them on top of each other to create a second set of layers. Repeat dusting, pressing down, rolling out, dusting, cutting and stacking one more time, dusting the work surface with flour as needed, to create a third set of layers, 18 layers total.
- Roll out the stack of dough to a thickness of about 1 1/2 inches. Cut out 9 biscuits with a floured 2 1/4-inch round cutter and place on the prepared baking sheet. Do not twist the cutter or it will seal the sides and prevent the layers from rising. Press together the remaining scraps of dough and cut out 3 more biscuits. Transfer the rest of the biscuits to the prepared baking sheet and transfer the baking sheet to the freezer while the oven preheats and until the biscuits are thoroughly chilled, 10 to 15 minutes.
- Preheat the oven to 425 degrees F.
- Brush the biscuit tops with buttermilk, taking care to keep the sides dry. Bake until the tops and bottoms of the biscuits are golden brown, 15 to 18 minutes. Brush the warm biscuits with melted butter as desired and serve.
Cook’s Note
When measuring flour, we spoon it into a dry measuring cup and level off excess. (Scooping directly from the bag compacts the flour, resulting in dry baked goods.) Be sure to keep the layers lined up and even when rolling out the dough after stacking. A good trick is to flip the dough over after every few rolls to ensure the bottom layers don’t shift.