


7 Tips for Simplifying Baking, According to a Decidedly Unfussy Cookbook Author
Because the best bake is one that you can snack quickly — and won’t leave your sink full of dishes.


Nico Schinco
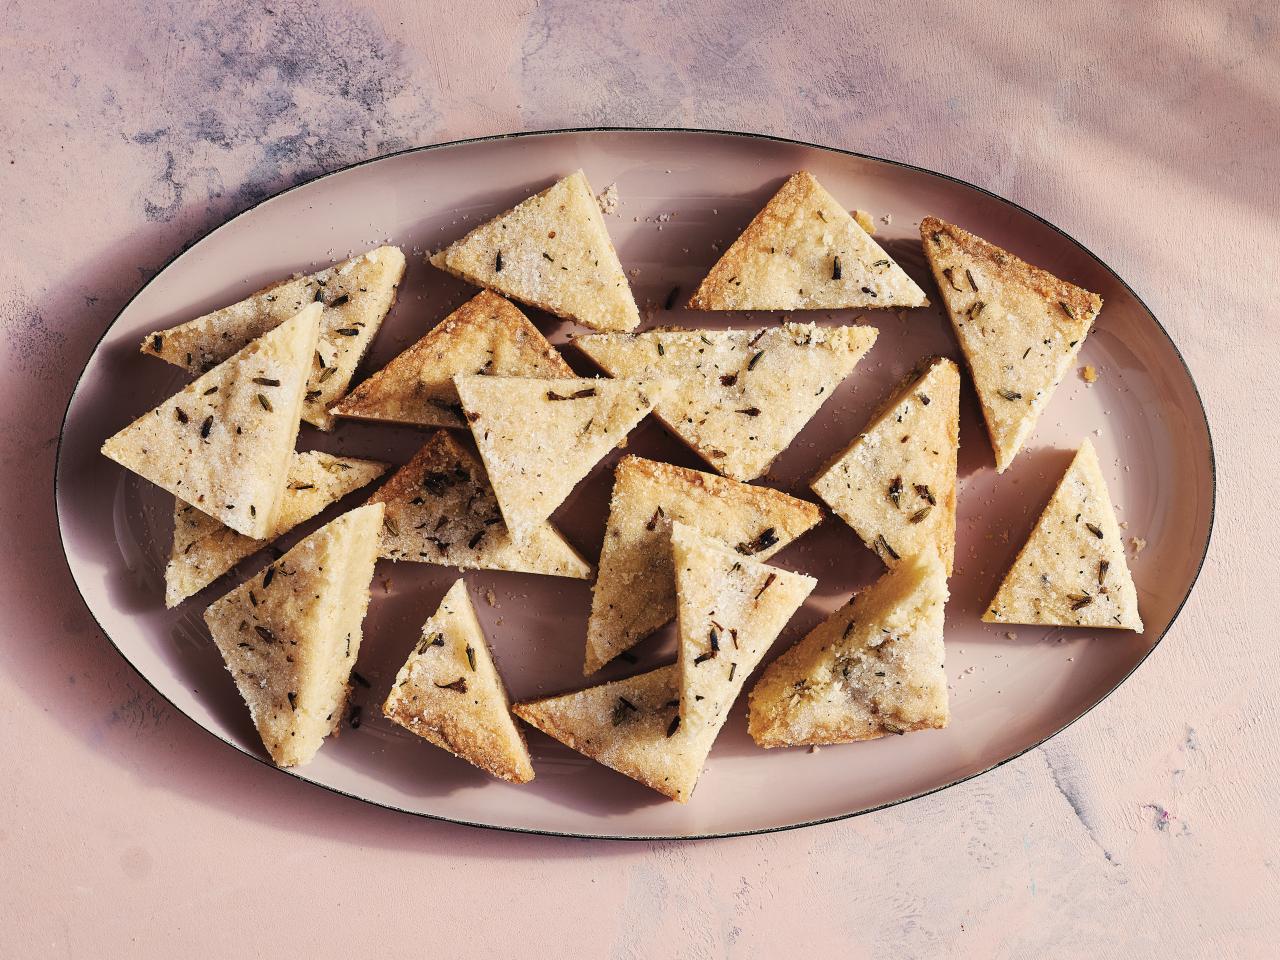
Get the Recipe: Tiny Lavender Shortbread Bites
Easy-peasy baking is my everything. I just adore recipes that are short on time and ingredients, but long on flavor, texture and straight-up deliciousness. As a recipe developer, I am always looking for ways to simplify and quicken the assembly of my baked goods. For instance, sometimes I want to avoid my stand mixer at all costs, and mix my batter or dough in only a single bowl. When appropriate, I’ll take advantage of my microwave, instead of my stovetop. Or I’ll lean into liquid fats (like melted butter and oil), rather than solid ones, to avoid embarking on the dreaded creaming stage in my (banished) mixer.
Moreover, besides developing recipes, I also write cookbooks, and in my latest, Snackable Bakes: 100 Easy-Peasy Recipes for Exceptionally Scrumptious Sweets and Treats, I apply all of my tips and tricks for unfussy sweets. Nary a snacking cake in the book (and there are many) requires creaming butter, cookies are always assembled in a single bowl and do not require a rest, ice creams are of the no-churn variety (natch), and fruit-filled desserts take the form of slumps, crisps and cobblers (with effortless biscuits calling for sour cream and self-rising flour), rather than pies (except, of course, when said pie calls for a press-in, melted butter crust, and not a lick of chilling). Here, I have unpacked some of my favorite tips from Snackable Bakes, those that will undoubtedly result in streamlined baking, and I've shared two recipes that tastily showcase the tips in action.

Add your leavening, salt and spices to your wet ingredients.
Most baking recipes instruct you to whisk your wet ingredients in one bowl, and your dry ingredients (flour, leavening, salt, spices) in another, before ultimately combining the two. Aggressively whisking all of the dry ingredients in their own vessel is considered the best way to evenly distribute the baking powder, soda, etc. into the flour, without fear of activating the flour’s gluten (the enemy of a tender baked good). Without proper distribution, pockets of leavening can cause holes or tunnels in a cake’s crumb, for instance, and pockets of salt or ground ginger in a cookie is just a bad time all around. But if you add your leavening, etc. to your wet ingredients, you can just as easily distribute it into your dough or batter, but without the need for the extra bowl. Moreover, because you distribute those ingredients prior to adding the flour, once you do fold in the flour, you can do so extra gently, to avoid overworking its gluten. Think of this tip next time you’re cake- or cookie-making, if you know what’s good for you.
You can melting and cool butter and chocolate simultaneously.
Sounds funny, I know, but more often than not a recipe calls for butter or chocolate to be melted and then cooled, which can take quite a bit of time. To me, this is practically a deal breaker. To avoid adding on even an iota of prep time, I recommend that you stop the melting process when you can still see visible butter/chocolate chunks amongst the melted liquid. Then, off the heat, whisk the mixture until smooth and chunk-free. Incorporating the cooler solid bits into the hot liquid instantly brings the liquid to warm-room temp, which is typically what recipes require. To see this tip in action, check out my recipe for Tiny Lavender Shortbread Bites (pictured above) from Snackable Bakes.
Bring eggs to room temp quickly.
To a snackable baker, there is little more annoying than realizing your recipe calls for room temp eggs and knowing that your stash remains comfortably chilly, tucked away on the second shelf of the fridge. Waiting for an egg to warm up on the counter can be time consuming, and time is in short demand when snackable baking. Thankfully, there’s an easy fix: place the eggs (still in their shells) in a small bowl of warm water for about 5 minutes on the counter – or, if you’re me, and can’t even be bothered to lift the bowl out of the sink, leave it right there where you filled it with water. Either way, once room temp, give the eggs a little shake or carefully dry them with a tea towel before cracking away. If you’re anything like me (a little forgetful when it comes to the old “recipe calling for room temp eggs” phenomenon), you’ll find yourself turning to this tip again and again when you bake.

Nico Schinco
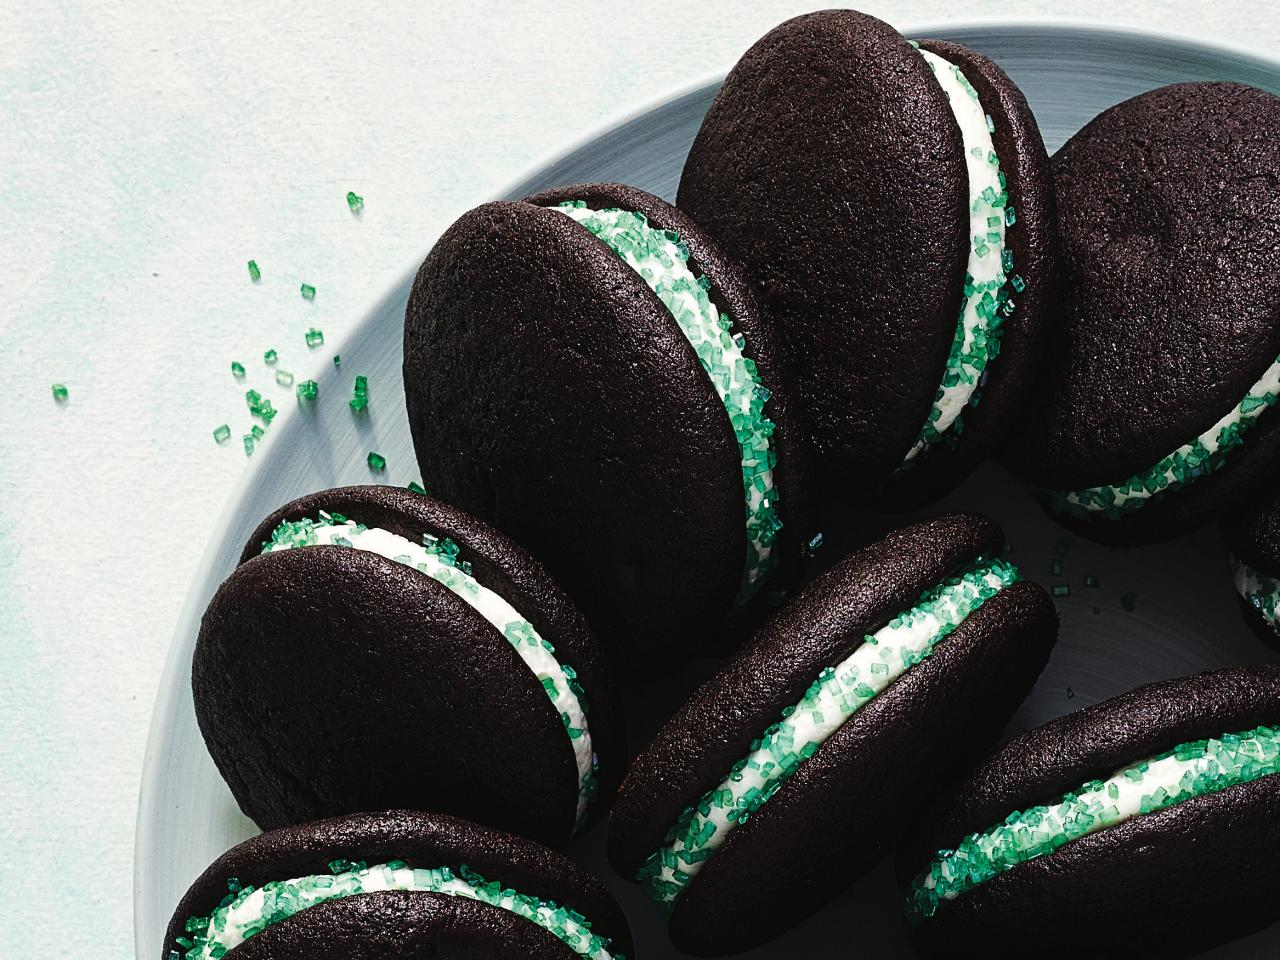
Get the Recipe: Chocolate Grasshopper Whoopie Pies with Minty Green Buttercream
Soften butter quickly.
Though a snackable baker never (there, I said it “never”) creams softened butter in a stand mixer when making cookies, cake or muffins, there’s no denying that an easy American buttercream does make for a lovely snacking cake topping or whoopie pie filling. Thus, when buttercream is in one’s future, but remembering to remove it from the fridge is in one’s past, you can do so quickly if you’ve got a microwave: place a wrapped stick of butter on a microwave-safe plate and microwave the butter on high, rotating the side of the butter that is facing up every 10 seconds, for about 40 seconds total, until just softened. And voila: now your batch of buttercream is only about 5 minutes away — and if you’re up for tinting it green and flavoring it with a little peppermint extract, well, then my Chocolate Grasshopper Whoopie Pies with Minty Green Buttercream have your name written all over them.
Hack your way to tempered chocolate.
Tempering chocolate (which is all about warming it to a certain temperature before allowing it to set, so it has a satisfying snap and does not melt all over your fingers) is really the antithesis of snackable baking, as it is fussy, tricky and takes some time. I mean full disclosure: despite my almost two decades of baking professionally, I don’t even really know how to do it properly (sorry, haters). But if you want to drizzle a little melted chocolate on a cookie or a piece of candy, like an easy-peasy brittle or macaroon, this hack works wonders — and I bet it would work for dunking and coating treats in chocolate, too. First, melt 75% of the chocolate you’re working with until smooth, perhaps in the microwave (my choice) or the stovetop, with a double boiler. Then, gently stir in the remaining 25% of the un-melted chocolate off the heat — this approximates the “seeding” method of tempering chocolate without fussing too much over the temperature. The room temp chocolate will bring the temp of the melted chocolate down and in the process, temper the chocolate. You can then drizzle the “tempered” chocolate on cookies or candy (such as brittle) without worrying about smudging the chocolate when eating, serving or storing your sweets.
Take advantage of your microwave.
I am extremely microwave-forward, particularly when a recipe begins with melted butter, which they so often do, or even melted chocolate. Here’s how things go down: I place my butter in my large microwave-safe bowl, cover it, and I melt the butter (right in the mixing bowl!) in the microwave. Once melted, I whisk in my sugar, vanilla, eggs, etc. directly into the bowl with the melted butter, and thus avoid dirtying an extra bowl, while streamlining and speeding up my recipe to boot. But even if my recipe does not begin with mixing the melted butter or chocolate with the other ingredients, I would still rather (quickly) do all my melting via my microwave, rather than on the stovetop, where in the case of chocolate, for instance, a double boiler is going to be involved.
Turn your chocolate chip cookies into blondies.
Cookies are great and all, but snackable bakers really dig bar cookies and here’s why. Bars are a billion times easier to make than cookies, as all you do is assemble the dough, press it into a pan, and bake. Done, done and done. There is no resting or chilling of dough, no scooping, no having baking sheet after baking sheet at the ready. Blondies are also easier to store and freeze and ship! And there is no reason why chocolate chip cookies should have all the bar-transforming fun — almost any drop cookie you can imagine can be transformed into a bar, such as ginger, peanut butter, lemon or sugar cookies — you name it, you can bar it.
Related Links:


.jpg.rend.hgtvcom.231.174.suffix/1681323015319.jpeg "535587181")

