Recipe courtesy of Nick Malgieri
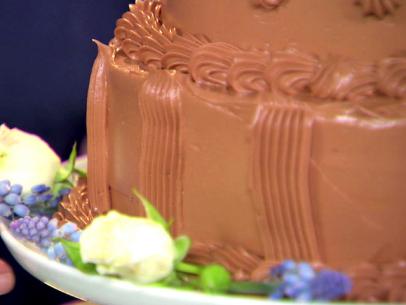
Tiered Cake
Getting reviews...
Directions
- Bake a single batch of cake batter in 2 (9-inch) pans, then a double batch in 2 (12-inch) pans. Assemble with a double batch of lemon buttercream. Insert some straws in the center of the 12-inch layer and cut them even with the top of the layer. Place the 9-inch layer on top. Use some of the buttercream to pipe a border at the base of the cake. Decorate with fresh raspberries.
- FILLING AND ICING A CAKE Though there are many techniques for filling and frosting a cake, they all have one common goal: to cover the cake neatly and efficiently. Many professional cake decorators use a turntable. The cake is placed in the center of the turntable and the icing is applied to the sides of the revolving cake. Others hold and turn the cake on one hand and spread the icing with a spatula held in the other. Both of these methods work well and easily, but require a certain amount of practice and dexterity to achieve. If you only intend to finish a few cakes a year, by far the easiest method is to put the cake on the platter from which it will be served and spread on the frosting from the top down, as in the following instructions:
- 1. For a single-layer cake, turn the cake upside down on the serving platter so that its flat bottom is up.
- 2. Brush all excess crumbs off cake, platter and work surface.
- 3. If you wish, cover the platter with narrow strips of waxed or other paper inserted under the edge of the cake to keep it free of drips. Pull the strips of paper away (pull from a short end) after cake is frosted. (Or, turn the cake over onto a piece of stiff cardboard, roughly 1/4-inch larger all around than the cake, then slide frosted cake from cardboard to platter. This method is better if you wish to finish side of cake with chocolate shavings, nuts or other solids.)
- 4. To frost with ganache and buttercream, apply a thin layer over the cake with an offset metal icing spatula. Spread it first on top then on the sides to seal the outside of the cake and prevent the cake's crust from crumbing up into the frosting. Chill cake for 10 minutes to set this first coat.
- 5. If you are frosting a two-layer cake, place one layer on platter, bottom side down. Spread a 1/2-inch layer of the frosting over the top of this layer. Place second layer on frosting bottom side up. Proceed with steps 3 or 4, above.
- 6. To put the final coat on the cake, place 4 or 5 dabs of the frosting on the top of the cake. Use the spatula to join the dabs and cover top of cake. Spread from center outward so excess frosting falls down sides of cake.
- 7. To finish the sides, hold spatula handle upward, blade about 1/8-inch away from side of cake, and spread any frosting already on side of cake smooth. Add more dabs of frosting to sides of cake if necessary so it is covered evenly. Finish the top by spreading any icing standing up around edge of cake evenly in toward the center. Hold spatula at a slight slant across the top of cake.
- 8. If you with to press toasted nuts, shaved chocolate or other solids onto the side of a cake, do so immediately. Hold cake on one hand and tilt toward the nuts or chocolate. Bring the cake directly against them. Use other hand to press nuts onto cake. Use a spatula to press chocolate so it doesn't melt against your hand.
- CAKE DECORATING Although dozens of books are published each year on this subject alone, you need not have a degree in cake decorating to produce a great-looking cake. There are many ways to finish a cake without resorting to a pastry bag and tubes, although piping decorations onto a cake can be easy -- and fun. Remember the one cardinal rule of good decorating: use decorations appropriate to the flavors in the cake. Streaking a coffee frosted chocolate cake with chocolate is appropriate. Piping rosettes of coffee buttercream around the top edge of the cake would also be appropriate. Topping the rosettes with strawberries would not!
- POPULAR DECORATIONS All the following decorations are easy to do. For best results practice making the decoration on a plate or the back of a cake pan before attempting it on the cake.
- STREAKING: Use an ounce of chocolate melted with 1/4 teaspoon oil. Place in a plastic bag (snip off corner), squeeze bottle or paper cone and streak top of cake with parallel lines. Make sure to come completely off the top of the cake, before starting another line, to avoid loops at the edge or side of cake.
- WRITING: Writing HAPPY BIRTHDAY and the birthday person's name on the cake is pretty much obligatory for a birthday cake. Use your regular handwriting, whether cursive or printing, and practice a few times on a cake pan or plate the same size as the cake top, so you can center the message evenly. Use the same tools and material as STREAKING, above.
- ROSETTES: To make a good rosette, hold a pastry bag with star tube straight up and down about 1/2-inch above the cake top. Squeeze gently from the top of the bag and describe a letter "C" with the end of the tube. After completing the rosette, release the pressure and pull away sideways, not upward.
- STARS: Hold the bag and star tube as for rosettes, above. Squeeze once, to press a star shape from the bag. Release pressure and pull away straight up from star.
- SHELLS: Hold bag with star tube at a 45 degree angle to top of cake, with tube just touching cake top. Squeeze, pull sideways around the top edge of the cake and release pressure in one quick motion to make a pointed shell shape. Start next shell over point of previous one.
- BORDERS: A border is an excellent finish for the top or bottom of a cake. Use ROSETTES, SHELLS or STARS. ROSETTES and STARS may be placed at a distance from each other, or touching, according to your preference. For further decoration top a rosette or star with a nutmeat, inverted chocolate chip, large chocolate shaving or a piece of fresh or candied fruit, if appropriate to the flavors of the cake for a further decoration.