


Everything You Need To Know About Making Instant Pot Yogurt
Make quality yogurt right at home for a fraction of the cost with these tips and tricks.
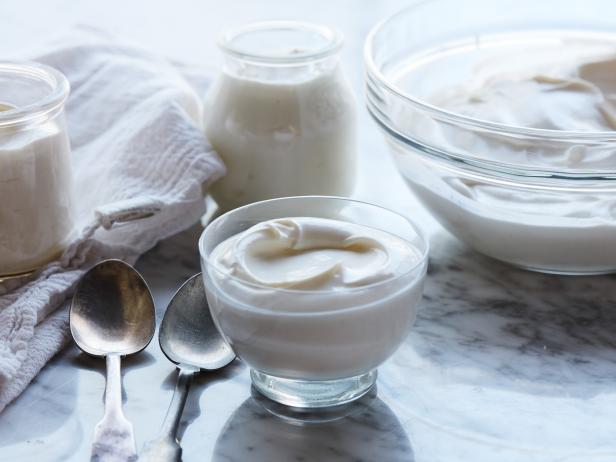
Matt Armendariz
We eat a lot of yogurt in my house. My kids devour it with honey or granola, while I prefer mine with chopped nuts, fruit and drizzled with date syrup. We use it to make tzatziki and raita to dollop on our stews, and in place of sour cream on our tacos.
That being said, we're also picky about our yogurt — we prefer thick, creamy, Greek-style yogurts over the plain, full-fat varieties which are often thickened with pectin, giving them a jelly-like texture, we find offputting.
However, Greek yogurt is expensive. To make it, finished yogurt is strained through fine mesh, which removes the cloudy liquid called whey — this process leaves a thicker product behind, but it also means you have less yogurt, which is why you get charged more!
I recently purchased a new Instant Pot on Amazon Prime Day and decided to use it to make my very own yogurt. Once I did, I was hooked. Making yogurt in the Instant Pot is satisfying, better-tasting, and ends up costing me less than what I would pay to buy it at the grocery store. Here are some tips and tricks I've learned along the way.
There Are Two Methods for Making Yogurt in an Instant Pot
The "Boil Method"
There are two methods used to make yogurt in the instant pot. The first one is called the “boil method.” With this method, you heat milk on the Instant Pot’s boil setting to a temperature between 180 and 212 degrees F and then cool it down to 110 to 115 degrees F to add the culture to it.
You heat the milk for two reasons: the first is to kill any lingering undesirable bacteria in it before adding the good bacteria to it and growing that. The second is to break apart the protein bonds, which allows your yogurt to thicken.
The "Cold Start Method"
The second method you can use to make yogurt in the Instant Pot is the “cold start method.” In the “cold start method,” you do just that – start the mixture cold, whisking in a little starter yogurt. No boil setting, fussing with thermometers, or stopping and opening and restarting again to try and hit the correct temperature.
For this method, it’s important to use Ultra-Pasteurized milk or Ultra Filtered Milk, or it won’t work. The milk needs to have been heated to a higher temperature first so that the yogurt thickens, and the right bacteria grow.
Eliminating two whole steps from the process worked better for me, my Instant Pot and my schedule. The drawbacks of this method are that you might have to culture your yogurt a bit longer (especially when doing individual ramekins) and that it can be finicky with the type of milk you use.

Your Instant Pot Type Matters
I have an 8-quart Instant Pot – which is bigger than the standard 6-quart size most people have. In most recipes, it doesn’t make a difference, but for making yogurt with the “boil method,” I found that it did. On the first step in the “boil method,” you heat the milk to between 180 and 212 degrees F. I had a hard time getting the temperature right.
If I opened my unit to check on it before the boil setting ended, I would lose too much heat that would take long to rebuild again.
If I ran the full cycle it would boil hard, which made my end result more like a custard than a yogurt. Because of this, I eventually switched to “the cold start method,” which for me was easier and gave me a better result.
It's also worth noting that you should not make yogurt in an Instant Pot without the yogurt button. Making yogurt in an Instant Pot without a yogurt setting/button comes with food safety concerns and could produce yogurt that is not safe to eat.
Your Milk Matters
Not all milk is created equal. There are variations in the way the milks are processed brand to brand, so if two brands are both pasteurized, it’s possible they were done in slightly different ways. There are also variances in what the cows eat – which would affect the flavor and chemical makeup of the milk. All of these things will affect the end result. If you aren’t getting the end result you want, try switching milk brands. Just make sure you stick with the type of milk the recipe calls for, such as Pasteurized, Ultra-Pasteurized or UHT.
Get Off to a Good Start
A “starter culture” is the seed you plant in the milk that will grow the bacteria you want to transform it into the final product. There are different mixtures of these bacteria used in commercial yogurt-making, which also gives the yogurt different flavors. Choose a store-bought yogurt that you like the flavor of and start with that, being sure it says on the label it has active cultures. Plain yogurt works best, but a little flavored yogurt works, too. Once you get going, you can save a little from your last batch to seed the next one.
Take Your Time
There is a wide window of how long to culture your yogurt to get the result you want. The longer you culture it, the more set it is, but also the more sour it becomes. Heating the milk first will enable your yogurt to set up thicker.
If you like a thinner, more sour yogurt, then maybe “cold start” is the way to go with a long culture time.
If you like a thicker, less tart style, then try the “boil method” with a shorter culture time. Experiment with different combinations and see what works for you!
Let It Chill
When your yogurt is done, it will be somewhat set and not stable. Don’t skip the step of chilling it, because that is where the magic happens! I found that taking the base out of the Instant Pot and letting the liquid cool at room temperature for an hour first makes for a better set. The yogurt cools more consistently this way, instead of from the outside in. It also makes your refrigerator work a little less hard and doesn’t risk warming up the foods you have inside. This also works if you are making your yogurt in individual containers.
Straining is Simple
If you like thick and creamy Greek-style yogurt like I do, you can strain it. A fine mesh strainer or cheesecloth lined strainer set over a bowl in the refrigerator all work, but I like using a European yogurt basket with a snap-on lid to save space because it’s stackable. The mesh is also ultra-fine making sure you get a better yield.
If you strain out too much liquid, don’t worry, just stir enough back in until you get the consistency you want. That strained out whey can be used as part of your liquid in bread baking or smoothies, or to cook grains in.
You Can Customize
There are so many possibilities when making yogurt yourself. You can make it thick or thin, do it in individual containers or one big batch. You can also flavor it. Try using Instant Chai tea stirred into the milk or using chocolate milk instead of regular milk. I love coffee-flavored yogurt, so sometimes I stir a little instant coffee and sweetened condensed milk in before culturing. The results are so decadent it’s almost dessert!
Related Links:


