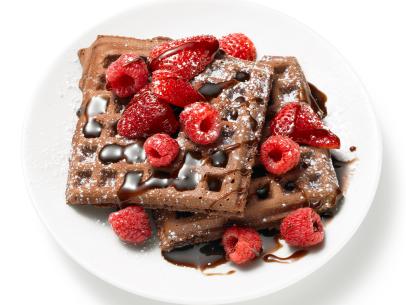
Glazed Waffle Cookies
- Level: Easy
- Total: 1 hr 45 min (includes cooling time)
- Active: 1 hr
- Yield: 55 small cookies
-
- Nutritional Analysis
- Per Serving
- Serving Size
- 1 of 12 servings
- Calories
- 265
- Total Fat
- 10 g
- Saturated Fat
- 5 g
- Carbohydrates
- 43 g
- Dietary Fiber
- 1 g
- Sugar
- 34 g
- Protein
- 2 g
- Cholesterol
- 55 mg
- Sodium
- 150 mg
Ingredients
Cookies:
Glaze:
Directions
- Preheat your waffle iron according to the manufacturer's instructions. Lightly grease the iron with nonstick spray. Keep the spray handy and occasionally reapply it between batches.
- Meanwhile, make the cookie batter: In a medium bowl, whisk together the butter and both sugars. Add the eggs one at a time, beating well to incorporate each one. Beat in the vanilla.
- In another medium bowl, whisk together the flour, baking soda, and salt. Gently fold into the butter mixture, mixing just until fully incorporated.
- Working in batches, use a No. 60 (1-tablespoon) scoop or spoon to place 1-tablespoon mounds of batter onto the center of the preheated waffle iron, then close the iron. Bake the cookies until golden on both sides and cooked through, 1 to 2 minutes. Remove the cookies from the iron and transfer to a wire rack to cool. Repeat with the remaining batter. Cool completely.
- Make the glaze: Combine the berries, sugar, lemon zest, and lemon juice in a medium saucepan; bring the mixture to a simmer and cook over medium heat until the berries break down, 10 to 12 minutes. Use a potato masher or the back of a wooden spoon to crush the berries. When the berries are very soft and have released their juices, strain the juices through a strainer set over a medium bowl and let cool to room temperature.
- Add the powdered sugar to the juice and whisk until a smooth glaze forms.
- One at a time, dunk the cooled cookies into the glaze, shake off the excess glaze (glaze that pools in the nooks and crannies won’t set very well), and invert the cookies onto a wire rack--the glaze will set in 10 to 15 minutes.
Cook’s Note
Make Ahead and Storage: The glazed cookies will keep airtight for up to 3 days. The glaze keeps them from going stale at first, but it begins to break down after a few days. Why It Works: A waffle iron applies direct, even high heat to the batter. The result is a cookie with all the same pros as great waffles--crisp on the outside and slightly soft inside--but just cookie-er. Pro Tip: The glaze recipe makes more than you need, but it's great to have on hand--lovely on scones, muffins, doughnuts, cupcakes, or sugar cookies. Store extra glaze in an airtight container in the refrigerator for up to 2 weeks. Bring to room temperature and stir before using again. If it dries out, thin it with water, milk, or cream.

