Recipe courtesy of Food Network Kitchen
Recipe courtesy of Food Network Kitchen
Watch how to make this recipe.
Pumpkin Cut-Out Pie
Getting reviews...
- Level: Easy
- Total: 4 hr 20 min (includes chilling, freezing and cooling times)
- Active: 35 min
- Yield: 8 to 10 servings
-
- Nutritional Analysis
- Per Serving
- Serving Size
- 1 of 10 servings
- Calories
- 445
- Total Fat
- 25 g
- Saturated Fat
- 15 g
- Carbohydrates
- 47 g
- Dietary Fiber
- 3 g
- Sugar
- 20 g
- Protein
- 9 g
- Cholesterol
- 172 mg
- Sodium
- 240 mg
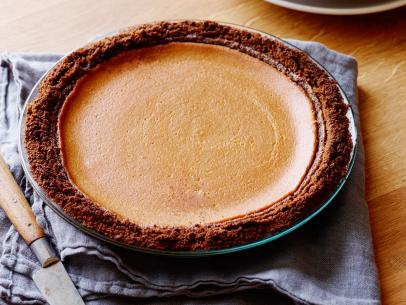
Classic pumpkin pie tastes great as is, but you can jazz up its appearance with a simple pumpkin cut-out made with extra dough. It bakes with the pie so there are no extra baking steps; and your guests will love the whimsical attention to detail.
- Level: Easy
- Total: 4 hr 20 min (includes chilling, freezing and cooling times)
- Active: 35 min
- Yield: 8 to 10 servings
-
- Nutritional Analysis
- Per Serving
- Serving Size
- 1 of 10 servings
- Calories
- 445
- Total Fat
- 25 g
- Saturated Fat
- 15 g
- Carbohydrates
- 47 g
- Dietary Fiber
- 3 g
- Sugar
- 20 g
- Protein
- 9 g
- Cholesterol
- 172 mg
- Sodium
- 240 mg
Ingredients
Dough:
Filling:
Directions
- For the dough: Whisk together the flour, granulated sugar and salt in a medium bowl. Using your fingers, work the butter into the dry ingredients until it resembles yellow cornmeal mixed with bean-sized bits of butter. (If the flour/butter mixture gets warm, refrigerate it for 10 minutes before proceeding.) Lightly beat 2 eggs in a small bowl. Stir them into the dough with a fork or by hand. If the dough is dry, sprinkle up to a tablespoon cold water over the mixture.
- Alternatively, make the dough in a food processor. In a machine fitted with the metal blade, pulse the flour, sugar and salt until combined. Add the butter and pulse until it resembles yellow cornmeal mixed with bean-sized bits of butter, about 10 times. Lightly beat 2 eggs in a small bowl, add them to the machine and pulse 1 to 2 times; don't let the dough form into a ball in the machine. (If the dough is very dry, add up to a tablespoon cold water.) Remove the bowl from the machine, remove the blade, and bring the dough together by hand.
- Form the dough into a ball, then cut in half. Form each half into a disk, wrap with plastic wrap, and refrigerate until thoroughly chilled, at least 1 hour.
- On a lightly floured surface, roll 1 disk into a 12-inch circle about 1/8-inch thick. Transfer the dough to a 9-inch pie dish and trim the edges, leaving about 1 extra inch hanging over the edge. Tuck the overhanging dough underneath itself to form a thick edge that is even with the rim. Flute the edge as desired. Freeze the pie shell for 30 minutes.
- Line a baking sheet with parchment. On a lightly floured surface, roll the remaining disk into a 12-inch circle about 1/8-inch thick. Transfer the dough to the prepared baking sheet and freeze for 30 minutes.
- Position 2 oven racks in the center and lower third of the oven and preheat to 400 degrees F. Put a piece of parchment or foil over the pie shell and fill with dried beans or pie weights. Bake on a baking sheet on the center rack until the dough is set, about 20 minutes. Remove from the oven and lift the sides of the parchment paper to remove the beans. Continue baking until the pie shell is lightly golden brown, about 10 more minutes. Cool on a rack. Lower the oven temperature to 350 degrees F.
- Meanwhile, make the pumpkin cut-out. Lightly beat the remaining egg in a small bowl. Remove the rolled dough from the freezer and, working on the baking sheet, cut out a solid 9-inch circle. Using a pattern or working free-handed, cut out two circles for the eyes, a triangle for the nose, and a toothy grin to resemble a jack-o'-lantern's face. Mimicking the ribbed indentations of a pumpkin, cut out indentation markings along the top, bottom, and sides of the face (these will act as vents for the filling as well). Using a scrap of dough, cut out a "stem" and attach it to the top of the face using the beaten egg wash as glue. Return the face to the freezer for 20 minutes.
- For the filling: Meanwhile, in a large bowl, whisk together the pumpkin puree, eggs, brown sugar, half-and-half, cinnamon, allspice, ginger, salt and nutmeg until smooth. Return the pie shell to the baking sheet and pour in the filling.
- Brush the frozen pumpkin face with the beaten egg, then lift it off the baking sheet. Place the face gently over the filling.
- Bake on the lower oven rack until the top crust is golden brown and the filling is set but the center is still slightly loose, 50 to 60 minutes. (If the edges get very dark, cover them with aluminum foil.) Cool on a rack. Serve slightly warm or at room temperature.
Cook’s Note
When measuring flour, we spoon it into a dry measuring cup and level off the excess. (Scooping directly from the bag compacts the flour, resulting in dry baked goods.)