


Recipe courtesy of Valerie Bertinelli
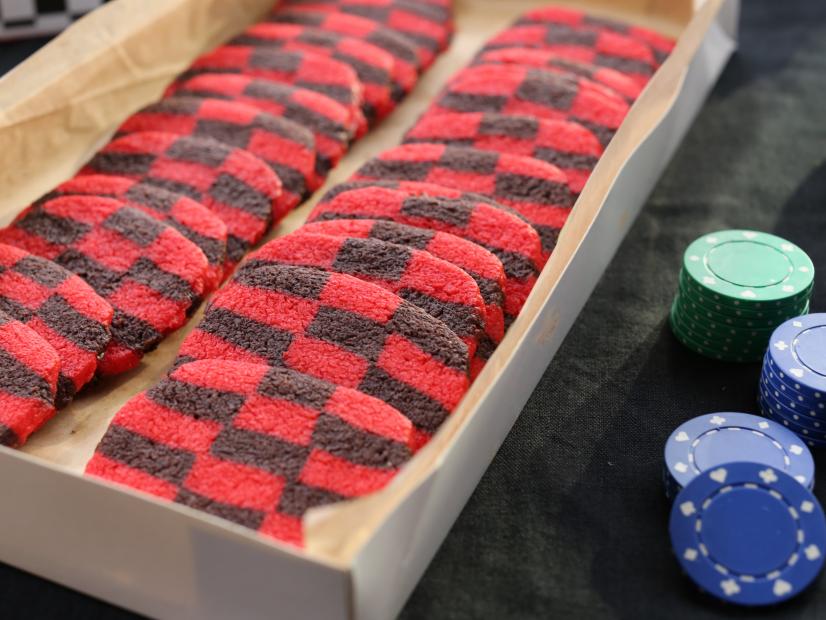
Red and Black Checkerboard Cookies
Getting reviews...
- Level: Intermediate
- Total: 3 hr 15 min (includes chilling and cooling time)
- Active: 50 min
- Yield: 24 cookies
-
- Nutritional Analysis
- Per Serving
- Serving Size
- 1 of 24 servings
- Calories
- 124
- Total Fat
- 8 g
- Saturated Fat
- 5 g
- Carbohydrates
- 13 g
- Dietary Fiber
- 0 g
- Sugar
- 6 g
- Protein
- 1 g
- Cholesterol
- 20 mg
- Sodium
- 41 mg
Ingredients
Directions
- Beat the butter, sugar, vanilla and salt together in a large bowl with an electric mixer on high speed until light and fluffy, about 3 minutes. Add 1 1/2 cups flour and beat on low until incorporated.
- Divide the dough in half. (This recipe relies on precision, so use a scale if you have one.)
- Return half of the dough to the bowl and add about 8 drops food coloring and the remaining 2 tablespoons flour. Beat until thoroughly incorporated. Add more food coloring until the dough is a true, bright red, beating well to fully distribute the color. Wrap the dough in plastic and refrigerate until just firm, about 30 minutes.
- Put the remaining dough in the bowl and add the cocoa powder. Beat until evenly distributed. Wrap the dough in plastic and refrigerate until just firm, about 30 minutes.
- Use a ruler to draw a 7-inch square on 2 pieces of parchment. Invert one piece of parchment and put one piece of dough in the square. Cover with another, unmarked parchment and pat and roll the dough to the dimensions of the square, making sure it is an even thickness. Trim the edges of the square if necessary. Carefully transfer the dough on the parchment to the refrigerator and chill until firm.
- Meanwhile, repeat with the other piece of dough and chill.
- Take out one square of dough and use a ruler to carefully cut it into 9 3/4-inch-thick strips (there may be extra dough). Carefully return the dough to the refrigerator until firm and repeat with the other square of dough. Refrigerate until firm.
- Lay out a clean piece of parchment paper. Carefully arrange three strips of dough directly next to each other on the parchment, alternating colors (i.e. red, black, red). Top each strip with a strip of the opposite color to make a second layer. Continue to layer, again alternating colors, to make a cookie brick; it will be 3-by-6 inches. Use a ruler or the side of a bench scraper to straighten the edges of the brick. Wrap the brick in the parchment paper, gently turning and pressing against the work surface to flatten out all the sides. Refrigerate until firm, about 30 minutes.
- Position oven racks in the upper and lower thirds of the oven and preheat to 350 degrees F. Line 2 baking sheets with parchment.
- Slice the brick crosswise into 1/4-inch-thick cookies, arranging them about 1/2 inch apart on the prepared baking sheets.
- Bake the cookies, switching the positions of the baking sheets halfway through, until slightly puffed and just set, 12 to 13 minutes.
- Cool on the pans 5 minutes, then transfer to a rack to cool completely.
Looking for Something Else?


Related Pages
- Neapolitan Holiday Cookies Recipe
- Chewy Schmaltz Oatmeal-Raisin Cookies Recipe
- Crispy Chocolate-Mint Cookies Recipe
- Sweet and Savory Cornbread Cookies Recipe
- Coconut-Chocolate Chip Cookies Recipe
- Breakfast Sandwich Cookies Recipe
- Thyme and Gruyere Savory Cookies Recipe
- Chocolate and Orange Hazelnut Cookies Recipe
- Triple Chocolate Salted Brownie Cookies Recipe