


How to Make a Salami Rose
How to make the adorable cheeseboard garnish that’s all over social media.

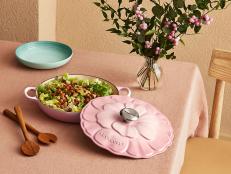
Meg Quinn
By Layla Khoury-Hanold for Food Network Kitchen
Layla Khoury-Hanold is a contributor at Food Network
If you’re a fan of charcuterie and cheese boards (or ogling them on social media), chances are you’ve encountered the salami rose. To bring you the best tips and tricks, we chatted with one of the people who helped popularize the salami rose: Meg Quinn (@ainttooproudtomeg), a food stylist and author of The Cheese Board Deck: 50 Cards for Styling Spreads, Savory and Sweet.
Why Would You Make a Salami Rose?
Salami roses add a festive and decorative touch to charcuterie and cheese boards and are an easy way to elevate your entertaining game. “That’s the thing about charcuterie and cheese boards in general—it really shows that you’ve put some care into entertaining,” Quinn says. “I’m all about special moments in my boards throughout, and salami roses are certainly one way to do that.”
Quinn says that salami roses can be used on all kinds of boards, but she particularly loves using them on themed boards. She’s used salami roses on Valentine’s Day and Mother’s Day boards, a charcuterie holiday wreath, and even on a birthday cheesecake, where she garnished stacked wheels of Humboldt Fog with salami rosettes and fresh berries.
Salami roses also make for a great conversation starter and ice breaker as people gather around the board. And they make for a fun kitchen project, too, whether you’re looking for time alone in the kitchen or want to cook with your friends, partner or kids. “I always encourage people to make boards together. One thing I found with The Cheese Board Deck is that kids love it. Kids love making and playing with food in that way.”

Thanksgiving Charcuterie Board
Piles of crunchy vegetables, stacks of fruit, slices of cheese, and folds of turkey meat are tucked alongside the easiest candied nuts, an extra-herby cheese ball, a sweet potato spread with a little marshmallow swirl, and — the showstopper — a baked Brie in the shape of a pumpkin.

How To Build a Perfect Charcuterie Board
A beautiful charcuterie board is a statement piece and a time saver, since it typically requires no cooking.
Salami Roses vs Salami Rosettes
Salami roses were popularized in social videos, featuring a method that involves folding layers of overlapping salami slices on a wine glass (or jar) rim to create a rose effect. They’re a showstopping garnish, but salami roses aren’t always conducive to serving and eating. “To be honest, they look beautiful, but the layers of salami are not very practical,” Quinn says. “Instead of having the salami spread out on a board where someone could take one at a time, you’re all forced to touch everything. And once you start touching it, it unfolds.” She adds that sometimes salami roses also fall into the trap of being too pretty to eat.
Although Quinn has made salami roses before, she’s partial to making salami rosettes. Four slices of salami are folded in half, lined up in an overlapping fashion, then tightly rolled and secured with a toothpick. “They’re more realistic for one person to eat. You see one person picking it up and putting it on an appetizer plate. You don’t have to split it up,” Quinn says.
She’s also seen a third method for making salami roses, using plastic condiment cups to arrange the salami slices to create a rose effect, then leaving the assembled rose in the cup for serving. This allows diners to take pieces from it, rather than the whole thing. Still, Quinn isn’t convinced. “I think it’s less conducive to serving, and people are all touching the same thing,” Quinn says. “That one supposedly stays together well, but I’ve never used it.”
What You Need to Make a Salami Rose
The number of salami slices will vary depending on whether you’re making a salami rose or rosette, and the technique used for each informs what type of equipment you’ll need. When selecting salami, choose slices that are pliable. Don’t use salami that is too thick (meats like pepperoni won’t hold their shape) or salami that’s sliced too thin, which makes it susceptible to ripping and doesn’t have enough structure to hold its shape.
- Salami Rosette: 4 salami slices; 2 toothpicks or party picks, for securing. Quinn has also used rosemary sprigs to secure salami rosettes (be sure to clean the rosemary first).
- Salami Rose Using a Wine Glass: 12 slices of salami; wine glass (or glass jar). To make a smaller salami rose using this method, Quinn recommends using a shot glass. A champagne flute is also a good option, as it has a smaller opening than large wine goblets. The number of slices will vary depending on the width of the glass opening; use your best judgment to use a quantity that’s proportionate to the glass size.
How to Make Salami Roses, Step-By Step
Salami Rosette
1. Fold the Salami: Fold four pieces of salami in half, so you have four half-circle shapes.

Meg Quinn
2. Line Up the Salami: Line the salami half-circles up in a row on a cutting board, overlapping the folded corners slightly. Each one should overlap only about a third of the next slice. Make sure that the straight part of each half-circle is in line with the straight part of the next.

Meg Quinn
3. Roll the Salami: Starting from the end with the outermost layer, securely roll up the whole row into a semi-tight roll. The tighter you go, the more your salami rosette will look like a bud.

Meg Quinn
4. Secure the Salami Rosette: Once you have a nice roll, push a toothpick through the bottom part (straight side) to hold all the slices together. Push a second toothpick in perpendicular so that the toothpicks cross in the center to secure your rosette.

Meg Quinn
5. Finish the Salami Rosette: Flip it around and arrange the “petals” to your liking. You can tug and pull a bit on each piece of salami to fan out the “petals” and make it look more like a rose.
Salami Rose Using a Wine Glass
- Fold the First Layer of Salami: Fold slices of salami over the entire rim of the glass in an overlapping fashion. Press down slightly on the salami along the rim and side of glass.
-
Fold the Next Layers of Salami: Repeat the folding process with more salami slices, until you’ve filled the glass. There should be no space visible in the middle; the center of the salami rose should have a point resembling a tight rosebud. The more salami you use, the fuller the rose.
-
Add Salami Rose to Board: Holding the rose in place, turn the glass upside down onto the board to deposit the salami rose where you’d like it to sit on your board. Carefully remove the glass. Quinn recommends adding the salami roses last and wedging them in amidst the other board components to help them hold their shape.
Can You Make Salami Roses Ahead of Time?
You can make salami roses up to a day in advance. Simply wrap finished salami rosettes in plastic wrap and nestle them closely together in an airtight container, then store in the refrigerator. If you’re making salami roses using the wine glass technique, keep the rose in the glass and wrap the protruding salami as best you can in plastic wrap.
Related Links:


