The Powerpuff Girls Mini Cakes
- Level: Intermediate
- Total: 3 hr 10 min (includes cooling time)
- Active: 2 hr 10 min
- Yield: three 5-inch cakes
- Level: Intermediate
- Total: 3 hr 10 min (includes cooling time)
- Active: 2 hr 10 min
- Yield: three 5-inch cakes
Ingredients
Cakes:
Buttercream:
Decoration:
Directions
Special equipment:
six 5-inch cake pans (or bake the cakes in batches); a pastry wheel; a 3-inch round cutter; a 1 1/2-inch round cutter; a 1-inch round cutter; 3/4, 1/2 and 1/4-inch round cutters or plain pastry tips with ends of these diameters; a small paintbrush- For the cakes: Preheat the oven to 350 degrees F (or to whatever temperature you need to bake your cakes). Spray six 5-inch round cake pans with cooking spray and line the bottoms with parchment circles.
- Prepare both cake mixes together according to the package directions. Divide the batter evenly among 3 bowls. Use the food coloring to make one bowl vibrant green, one vibrant blue and one vibrant pink. Divide each color between 2 pans (so you will have 2 layers of each color). Bake according to package directions, about 30 minutes. Cool the cake in the pans on racks for 10 minutes, then remove the cakes from the pans and cool completely on the rack. The cakes will have domed quite a bit, so level off the tops with a serrated knife.
- For the buttercream: Beat the butter in a stand mixer fitted with the paddle attachment on medium-high speed until very light and fluffy, 3 to 4 minutes. Scrape down the sides of the bowl and add the confectioners' sugar and salt. Mix on low just until combined, then mix in the vanilla and 5 tablespoons of the cream. Beat on medium high until light and fluffy, 2 to 3 minutes more, adding the last tablespoon of cream, if needed, to reach a spreadable consistency. Divide the frosting evenly among 3 bowls. Use the food coloring to dye one vibrant green, one vibrant blue and one vibrant pink.
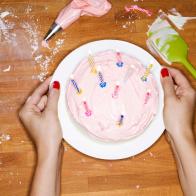
- Fill and frost each cake with its matching color buttercream, frosting between the layers and making a smooth layer of frosting over the sides and top of each cake.
- For decoration: Break off about half of the white fondant and set it aside covered so it doesn’t dry out. Add a drop or two of pink food coloring to the remaining piece of fondant and a small drop of yellow. Knead in your hands until the fondant is a uniform warm, pale color. This will be used for the faces of The Powerpuff Girls.
- Lightly dust your work surface with confectioners' sugar and roll out the pale-colored piece to a scant 1/8-inch thickness. Use a 3-inch ring cutter to cut out 3 round faces. Set aside on a piece of parchment paper.
- Roll out the pieces of black, yellow and orange fondant separately. Cut a circle from each using the 3-inch cutter. Cut through each crosswise about a third of the way down to make the hair for each girl. Use a small paring knife to cut in bangs, according to the style of each. Cut out two semicircles for the ponytails for the yellow hair and two small side triangles for the black hair. Set it all aside. Discard the remaining yellow and orange fondant but keep the black for the eyeballs and smiles.
- Roll out the reserved white fondant and also the green, blue and red fondant. Fill a small bowl with water and set aside. Each eye will be a series of 4 progressively smaller circles. Cut 6 white circles with a 1-inch round cutter. Using a 3/4-inch round cutter (or the base of a large pastry tip), cut 2 circles each from the blue, red and green. Dab the back of each circle with a little water using a small paintbrush and adhere them inside the larger white circles. Cut 6 scant 1/2-inch circles (again, using a small round cutter or plain pastry tip) from the reserved black fondant. Stick those, using the water, inside the colored circles. Finally, cut out six 1/4-inch circles from the white and stick them in the middle of the black circles in the same manner. You should have 3 pairs of eyes.
- To assemble, stick a plain face in the middle of each cake. Using the water, attach the orange hair to the girl on the pink cake, the black hair to the girl on the green cake and the yellow hair to the girl on the blue cake. Add the corresponding-colored eyes (red, green and blue) to each cake, adhering them with a little water. Cut a small circle from the remaining red fondant with a 1 1/2-inch round cutter and trim to make the bow for the orange-haired girl and stick it onto the frosting at the top of the head. Use a tiny bit of the remaining black fondant to roll a thin snake and cut into 3 smiles and stick those onto each face with a little water.
Cook’s Note
You can find all materials and pans at specialty baking supply stores or online, including food coloring and plain and colored fondant. While we suggest you have six 5-inch cake pans, you can also bake the cake layers in two batches if need be; just mix up only one cake mix at a time and thoroughly cool, wash and dry the pans between batches. When rolling the fondant, dust very lightly with confectioners' sugar so the colors stay bright. For the small eye circles, you can use small round cutters or plain pastry tips that match the specific diameters.
Looking for Something Else?
Related Pages
- Orange-Olive Oil Mini Cakes with Citrus Glaze...
- Eyeball Mini Cakes Recipe
- Tablescape Center Piece Mini Cakes Three Ways...
- Chocolate Beet Mini-Cakes Recipe
- Red, White and Blue Mini Layer Cakes Recipe
- Spiced Orange Blossom Tea Cakes Recipe
- Glazed Almond Mini Cakes Recipe
- Mini Tamarind and Mango Icebox Cakes Recipe
- Sweet Potato Mini Cakes with Cream Cheese...
