


Recipe courtesy of
Amy Stevenson
for
Food Network Kitchen
Recipe courtesy of
Amy Stevenson
for
Food Network Kitchen
Watch how to make this recipe.
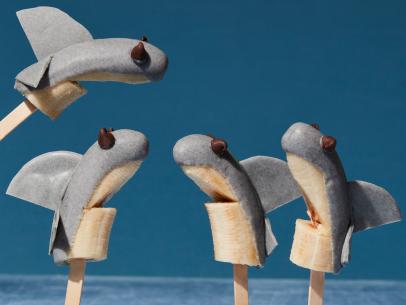
Shark Strawberries
Getting reviews...
- Level: Easy
- Total: 30 min
- Active: 20 min
- Yield: 12 shark strawberries
-
- Nutritional Analysis
- Per Serving
- Serving Size
- 1 of 12 servings
- Calories
- 162
- Total Fat
- 6 g
- Saturated Fat
- 2 g
- Carbohydrates
- 25 g
- Dietary Fiber
- 1 g
- Sugar
- 13 g
- Protein
- 2 g
- Cholesterol
- 3 mg
- Sodium
- 104 mg
Add crafting these adorable edible sharks to your Shark Week schedule. They come together quickly and for the most “sharky” look, we suggest choosing large, stem-on strawberries that are just a bit flat at the tip (versus very pointy). To prevent condensation, refrigerate the little sharks for no more than 2 hours before serving — or chomping!
- Level: Easy
- Total: 30 min
- Active: 20 min
- Yield: 12 shark strawberries
-
- Nutritional Analysis
- Per Serving
- Serving Size
- 1 of 12 servings
- Calories
- 162
- Total Fat
- 6 g
- Saturated Fat
- 2 g
- Carbohydrates
- 25 g
- Dietary Fiber
- 1 g
- Sugar
- 13 g
- Protein
- 2 g
- Cholesterol
- 3 mg
- Sodium
- 104 mg
Ingredients
Directions
Special equipment:
a silicone baking mat; kitchen-dedicated tweezers; a small paintbrush; a wooden skewer.- Line a baking sheet with a silicone baking mat. Microwave the white candy melting wafers in a microwave-safe bowl with 1 teaspoon of the shortening in 30-second intervals at 50% power, stirring in between each, until mostly melted with a few chunks remaining. Stir until completely melted.
- Pick up a strawberry by the stem and dip it in the white candy all the way up to the stem. Let the excess drip back into the bowl, then place the strawberry on the baking mat. Repeat with the remaining strawberries. Refrigerate for a few minutes to set the candy. Reserve the remaining melted white candy.
- Melt the blue candy melting wafers with 1 teaspoon shortening in the same manner as the white candy. Dip a side of each strawberry (about a third of the way) into the blue candy to make the top of the shark’s head, letting the excess drip back into the bowl. Using tweezers, stick a black sprinkle in the blue-dipped part before it sets to make an eye. Place on the baking mat. (You can also use a toothpick or skewer to draw 3 short lines through the blue before it sets to make gills, if desired.)
- Put most of the remaining melted blue candy in a small ziptop bag (or pastry bag) and snip off a very small bit of the tip. Pipe 12 shark fins, each 1/2 to 1 inch high. Refrigerate the fins and strawberries until set, about 4 minutes.
- Once set, remelt the remaining blue candy. Dip the bottoms of the fins in it and attach them to the top of the sharks. (You probably won’t need to refrigerate them again at this point, since the strawberries will be cold; the fins should stick right away.)
- Melt the red candy melting wafers with the remaining 1/2 teaspoon shortening. Use a small paint brush to paint a mouth on each shark face, just below the tip of the strawberry. Refrigerate until set, about 4 minutes.
- Remelt the reserved white candy, if needed. Dip the tip of a skewer in the white candy and make small dots all around each mouth for shark teeth. Refrigerate until set, just a few minutes. Serve within 2 hours.
Looking for Something Else?


Related Pages
- Pumpkin Cheese Ball Recipe
- Shark Slice-and-Bake Cookies Recipe
- Jiggly Shark Pops Recipe
- The Best Way to Store Strawberries According to...
- Shark Bait Recipe
- Shark Bite Ice Cream Sundaes Recipe
- How to Keep Chocolate Covered Strawberries Fresh...
- Chocolate Orange Fondue and Stem Strawberries...
- Halloween Chocolate-Covered Strawberries Recipe