


Thanksgiving Helpline
It's Turkey Day, the biggest food holiday of the year, and the Kitchen Helpline is open once again. We'll answer your tough questions and get you through Thanksgiving with ease.

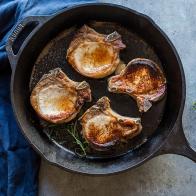
Jason DeCrow
QUESTION 1: "I'm hosting my first Thanksgiving this year. Any tips for efficient oven use and timing everything right? Help!"
The short answer is: It's all about oven order, so do the Oven Shuffle!
THE NIGHT BEFORE: Bake off all your pies because they can be served at room temperature.
THANKSGIVING MORNING: Get your turkey in the oven first, then utilize your stovetop. You can also make cranberry sauce and set it aside, since it too can be served at room temperature.
WHILE THE TURKEY COOKS: A sheet tray of veggies can squeeze right under the turkey on a lower rack.
WHILE THE TURKEY RESTS: The turkey can rest for an hour or two. Finish it earlier in the day so you can fill the oven with side dishes that won't take long to bake. Another great tip is to make Jeff's recipe for creamy baked mashed potatoes. They can be made ahead and frozen or made fresh up to 2 days ahead, saving you time on Thanksgiving Day.
The most important addition to your Turkey Day timeline is time to pour yourself a well-deserved glass of wine and get ready to receive your guests.

Jason DeCrow, 2015, Television Food Network, G.P. All Rights Reserved
QUESTION 2: "To brine or not to brine?"
The answer is simple…if you've got the time, it's best to brine!
The juiciest and tastiest birds are prepared with a brine. Wet brine is a salt and water solution that is sometimes seasoned with aromatics, spices or sugar. Brining adds moisture and flavor to turkey through the process of osmosis--finally, a use for that 6th grade science lesson! The salt solution both pulls water out of the meat and replaces it with flavorful brine. Sunny has a great recipe.
Check it out: Sunny's Autumn Fried Turkey
If you're short on fridge space and still want to brine, use a clean insulated cooler. Just make sure that the cooler is big enough for the turkey and lots of ice.
The first step is to prepare and cool your brine. Then, you need to combine your turkey with the brine. A great way to do this is to use a roasting/brining bag. An easy hack for filling the bag is to use a large painter's bucket. Put the bag inside the bucket, fold the ends of the bag over and drape them over the edge of the bucket (much like you would if you're filling a piping bag inside a glass). Clip the sides with clothespins to prevent slippage. Next, carefully lower the turkey into the bag, then fill the bag with the cooled brining liquid. Twist and knot to seal things up and double bag it if you're afraid of leakage.
Once you've prepped your turkey and filled the bag, line the bottom of the cooler with a layer of ice, place the bag in the cooler and cover with more ice. The turkey should stay below 40 degrees F, so add fresh ice to maintain this if necessary. To keep the temperature low, refrain from too much peeking. Brine the turkey in the cooler overnight. If you want to brine longer, you'll need to brine in the fridge where it can be kept for up to 2 days. When you're ready to roast, pat your turkey dry, allow it to come to room temperature for 1 to 2 hours and then roast away!

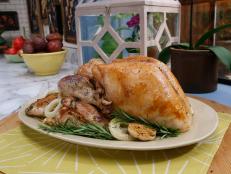
Jason DeCrow
QUESTION 3: "I dread Thanksgiving cleanup, especially all of those pans with baked-on crust. Any tips to make it easier?"
Here's a great solution: Free up your sink!
Most people pile Thanksgiving dishes into the sink, leaving themselves little room to actually wash the dishes. Most of us have large storage bins in the garage or basement, so why not give them double duty? Allowing dishes to soak in an outside tub frees up the sink until you're ready to put in a little elbow grease.
For a foolproof soaking solution, fill a large plastic storage container (we like a 30-quart one) halfway with hot water and a hefty squirt of dish soap. Next, stir in 1 cup of baking soda and 1 cup of white vinegar (the solution will fizz), then pop in your crusty pans and dishes. The addition of the baking soda and vinegar will help break down the caked-on food bits. Soak for 15 minutes and up to 2 hours. When you're ready to wash, rinse away loosened food and use a sturdy two-sided sponge to remove any remaining crust or food particles. Rinse, dry and turn in for a good night's rest…you've earned it!


